In this article, you’ll learn how to install PostgreSQL 12 on Fedora 33. PostgreSQL is one of the popular open-source database servers.
PostgreSQL is a powerful, open-source relational database management system. It is a highly scalable and efficient system that supports a wide range of data types and has advanced features such as built-in support for JSON and full-text search. Fedora is a popular Linux distribution that is known for its cutting-edge features and fast release cycle. In this tutorial, we will learn how to install PostgreSQL 12 on Fedora 33.
Prerequisites
Before we begin, make sure that you have a Fedora 33 system with root access. You will also need a terminal to run the commands.
Steps to install PostgreSQL 12 on Fedora 33.
Step 1: Update Fedora system packages
sudo dnf update -y
Note: Reboot your system after the update.
sudo reboot
Step 2: Add the PostgreSQL Yum Repository on Fedora 33
sudo dnf install https://download.postgresql.org/pub/repos/yum/reporpms/F-33-x86_64/pgdg-fedora-repo-latest.noarch.rpm
Press “y” to confirm the installation
Sample output:
[root@fedora ~]# sudo dnf install https://download.postgresql.org/pub/repos/yum/reporpms/F-33-x86_64/pgdg-fedora-repo-latest.noarch.rpm
Last metadata expiration check: 0:28:12 ago on Sun 31 Jan 2021 07:39:13 AM EST.
pgdg-fedora-repo-latest.noarch.rpm                                                                      6.6 kB/s |  10 kB     00:01

Dependencies resolved.
=============================================================================================
 Package                               Architecture                Version                      Repository                         Size
=============================================================================================

Installing:
 pgdg-fedora-repo                      noarch                      42.0-13                      @commandline                       10 k

Transaction Summary
=============================================================================================
Install  1 Package

Total size: 10 k
Installed size: 11 k
Is this ok [y/N]: y

Downloading Packages:
Running transaction check
Transaction check succeeded.
Running transaction test
Transaction test succeeded.
Running transaction
  Preparing        :                                                                                                                1/1
  Installing       : pgdg-fedora-repo-42.0-13.noarch                                                                                1/1
  Verifying        : pgdg-fedora-repo-42.0-13.noarch                                                                                1/1

Installed:
  pgdg-fedora-repo-42.0-13.noarch

Complete!
[root@fedora ~]#
Step 3: Install PostgreSQL 12 on Fedora 33
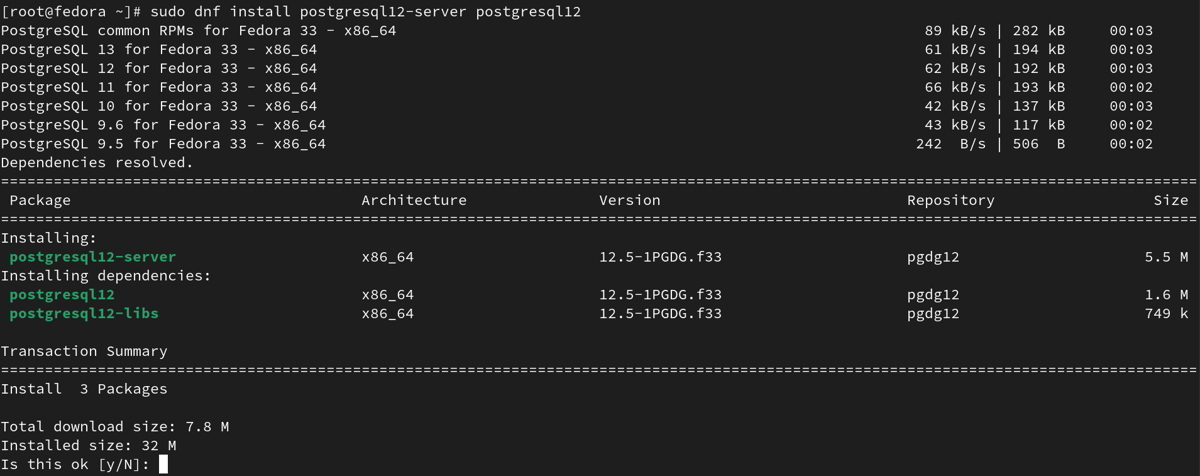
sudo dnf install postgresql12-server postgresql12
Press “y” to confirm the installation
Sample output:
[root@fedora ~]# sudo dnf install postgresql12-server postgresql12
PostgreSQL common RPMs for Fedora 33 - x86_64                                                            89 kB/s | 282 kB     00:03
PostgreSQL 13 for Fedora 33 - x86_64                                                                     61 kB/s | 194 kB     00:03
PostgreSQL 12 for Fedora 33 - x86_64                                                                     62 kB/s | 192 kB     00:03
PostgreSQL 11 for Fedora 33 - x86_64                                                                     66 kB/s | 193 kB     00:02
PostgreSQL 10 for Fedora 33 - x86_64                                                                     42 kB/s | 137 kB     00:03
PostgreSQL 9.6 for Fedora 33 - x86_64                                                                    43 kB/s | 117 kB     00:02
PostgreSQL 9.5 for Fedora 33 - x86_64                                                                   242  B/s | 506  B     00:02

Dependencies resolved.
===========================================================================================================
 Package                                 Architecture               Version                            Repository                  Size
===========================================================================================================
Installing:
 postgresql12-server                     x86_64                     12.5-1PGDG.f33                     pgdg12                     5.5 M
Installing dependencies:
 postgresql12                            x86_64                     12.5-1PGDG.f33                     pgdg12                     1.6 M
 postgresql12-libs                       x86_64                     12.5-1PGDG.f33                     pgdg12                     749 k

Transaction Summary
===========================================================================================================
Install  3 Packages

Total download size: 7.8 M
Installed size: 32 M
Is this ok [y/N]: y

Downloading Packages:
(1/3): postgresql12-libs-12.5-1PGDG.f33.x86_64.rpm                                                      299 kB/s | 749 kB     00:02
(2/3): postgresql12-12.5-1PGDG.f33.x86_64.rpm                                                           435 kB/s | 1.6 MB     00:03
(3/3): postgresql12-server-12.5-1PGDG.f33.x86_64.rpm                                                    668 kB/s | 5.5 MB     00:08
----------------------------------------------------------------------------------------------------------------------------------------
Total                                                                                                   949 kB/s | 7.8 MB     00:08

warning: /var/cache/dnf/pgdg12-c8926cd352a04735/packages/postgresql12-12.5-1PGDG.f33.x86_64.rpm: Header V4 DSA/SHA1 Signature, key ID 442df0f8: NOKEY
PostgreSQL 12 for Fedora 33 - x86_64                                                                    1.6 MB/s | 1.7 kB     00:00
Importing GPG key 0x442DF0F8:
 Userid     : "PostgreSQL RPM Building Project <pgsqlrpms-hackers@pgfoundry.org>"
 Fingerprint: 68C9 E2B9 1A37 D136 FE74 D176 1F16 D2E1 442D F0F8
 From       : /etc/pki/rpm-gpg/RPM-GPG-KEY-PGDG
Is this ok [y/N]: y
Key imported successfully
Running transaction check
Transaction check succeeded.
Running transaction test
Transaction test succeeded.
Running transaction
  Preparing        :                                                                                                                1/1
  Installing       : postgresql12-libs-12.5-1PGDG.f33.x86_64                                                                        1/3
  Running scriptlet: postgresql12-libs-12.5-1PGDG.f33.x86_64                                                                        1/3
  Installing       : postgresql12-12.5-1PGDG.f33.x86_64                                                                             2/3
  Running scriptlet: postgresql12-12.5-1PGDG.f33.x86_64                                                                             2/3
  Running scriptlet: postgresql12-server-12.5-1PGDG.f33.x86_64                                                                      3/3
  Installing       : postgresql12-server-12.5-1PGDG.f33.x86_64                                                                      3/3
  Running scriptlet: postgresql12-server-12.5-1PGDG.f33.x86_64                                                                      3/3
  Verifying        : postgresql12-12.5-1PGDG.f33.x86_64                                                                             1/3
  Verifying        : postgresql12-libs-12.5-1PGDG.f33.x86_64                                                                        2/3
  Verifying        : postgresql12-server-12.5-1PGDG.f33.x86_64                                                                      3/3
Installed:
  postgresql12-12.5-1PGDG.f33.x86_64       postgresql12-libs-12.5-1PGDG.f33.x86_64       postgresql12-server-12.5-1PGDG.f33.x86_64
Complete!
[root@fedora ~]#
Step 4: Initialize the PostgreSQL database
Once the installation is complete, you need to initialize the database cluster. A database cluster is a collection of databases managed by a single instance of a PostgreSQL server. To initialize the database cluster, run the following command:
$ sudo /usr/pgsql-12/bin/postgresql-12-setup initdb
This command will create the necessary directories and initialize the database cluster.
Sample output:
[root@fedora ~]#  sudo /usr/pgsql-12/bin/postgresql-12-setup initdb
Initializing database ... OK
[root@fedora ~]#
Step 5: Automatic start PostgreSQL service on boot
sudo systemctl enable --now postgresql-12
Sample Output
[root@fedora ~]# sudo systemctl enable --now postgresql-12
Created symlink /etc/systemd/system/multi-user.target.wants/postgresql-12.service → /usr/lib/systemd/system/postgresql-12.service.
[root@fedora ~]#
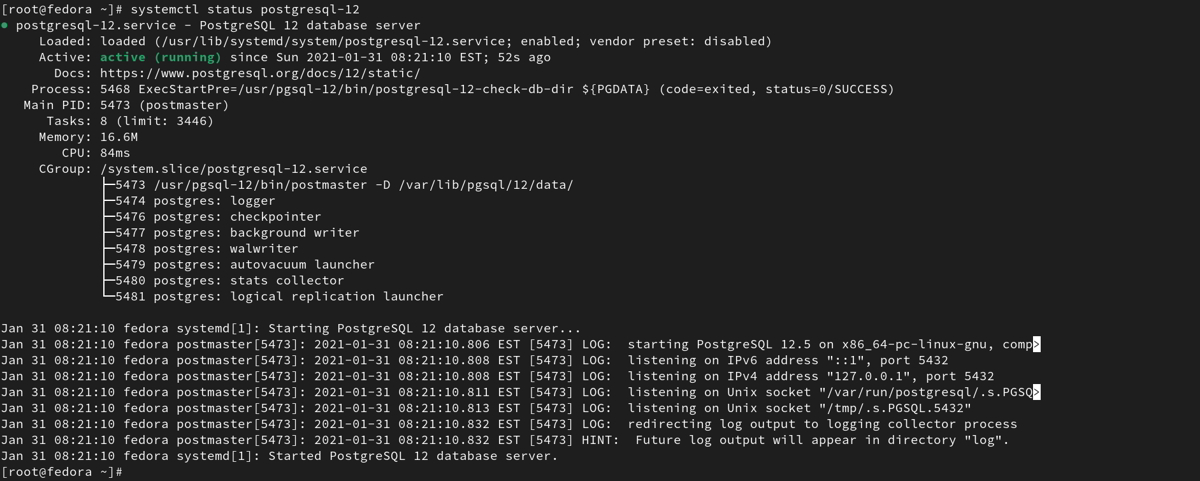
Step 6: Verify PostgreSQL service status
systemctl status postgresql-12
Sample Output
[root@fedora ~]# systemctl status postgresql-12
 postgresql-12.service - PostgreSQL 12 database server
     Loaded: loaded (/usr/lib/systemd/system/postgresql-12.service; enabled; vendor preset: disabled)
     Active: active (running) since Sun 2021-01-31 08:21:10 EST; 52s ago
       Docs: https://www.postgresql.org/docs/12/static/
    Process: 5468 ExecStartPre=/usr/pgsql-12/bin/postgresql-12-check-db-dir ${PGDATA} (code=exited, status=0/SUCCESS)
   Main PID: 5473 (postmaster)
      Tasks: 8 (limit: 3446)
     Memory: 16.6M
        CPU: 84ms
     CGroup: /system.slice/postgresql-12.service
             ├─5473 /usr/pgsql-12/bin/postmaster -D /var/lib/pgsql/12/data/
             ├─5474 postgres: logger
             ├─5476 postgres: checkpointer
             ├─5477 postgres: background writer
             ├─5478 postgres: walwriter
             ├─5479 postgres: autovacuum launcher
             ├─5480 postgres: stats collector
             └─5481 postgres: logical replication launcher
Jan 31 08:21:10 fedora systemd[1]: Starting PostgreSQL 12 database server...
Jan 31 08:21:10 fedora postmaster[5473]: 2021-01-31 08:21:10.806 EST [5473] LOG:  starting PostgreSQL 12.5 on x86_64-pc-linux-gnu, comp>
Jan 31 08:21:10 fedora postmaster[5473]: 2021-01-31 08:21:10.808 EST [5473] LOG:  listening on IPv6 address "::1", port 5432
Jan 31 08:21:10 fedora postmaster[5473]: 2021-01-31 08:21:10.808 EST [5473] LOG:  listening on IPv4 address "127.0.0.1", port 5432
Jan 31 08:21:10 fedora postmaster[5473]: 2021-01-31 08:21:10.811 EST [5473] LOG:  listening on Unix socket "/var/run/postgresql/.s.PGSQ>
Jan 31 08:21:10 fedora postmaster[5473]: 2021-01-31 08:21:10.813 EST [5473] LOG:  listening on Unix socket "/tmp/.s.PGSQL.5432"
Jan 31 08:21:10 fedora postmaster[5473]: 2021-01-31 08:21:10.832 EST [5473] LOG:  redirecting log output to logging collector process
Jan 31 08:21:10 fedora postmaster[5473]: 2021-01-31 08:21:10.832 EST [5473] HINT:  Future log output will appear in directory "log".
Jan 31 08:21:10 fedora systemd[1]: Started PostgreSQL 12 database server.
[root@fedora ~]#
Step 7: Configure Firewall
(Optional If you are using a firewall then follow the below steps)
– This will allow remote clients to connect to the PostgreSQL database server
sudo firewall-cmd --add-service=postgresql --permanent
sudo firewall-cmd --reload
Sample output
[root@fedora ~]# sudo firewall-cmd --add-service=postgresql --permanent
success
[root@fedora ~]# sudo firewall-cmd --reload
success
[root@fedora ~]#
Step 8: Allow remote access to PostgreSQL
This is optional, you can skip it if you don’t want to allow remote access to your PostgreSQL database server.
By default, PostgreSQL only listens on the localhost interface. If you want to access the PostgreSQL server from other computers on the network, you need to edit the PostgreSQL configuration file.
Edit file –> ” /var/lib/pgsql/12/data/postgresql.conf ”
$ sudo vim /var/lib/pgsql/12/data/postgresql.conf

listen_addresses = '*'
Once the file is open, look for the line that begins with listen_addresses. Uncomment the line by removing the # character at the beginning of the line and change the value to * to allow connections from any IP address.
Set Listen to address to your server IP address or you can mention “*” for all interfaces.
You need to set remote connections from allowed hosts.
$ sudo vim /var/lib/pgsql/12/data/pg_hba.conf

# Accept from anywhere
host all all 0.0.0.0/0 md5

# Accept from trusted subnet
host all all 192.168.3.0/24 md5
you need to restart the PostgreSQL service after changes are made to the config file.
sudo systemctl restart postgresql-12
Step 9: Set PostgreSQL admin user’s password
$ sudo su - postgres

$ psql -c "alter user postgres with password 'YourPassword'"
In the above command update ‘YourPassword’ to a strong password for Postgres user.
Sample output:
[root@fedora ~]#  sudo su - postgres
[postgres@fedora ~]$ psql -c "alter user postgres with password 'YourPassword'"
ALTER ROLE
[postgres@fedora ~]$
Step 10: Create a PostgreSQL User
To create a new PostgreSQL user, run the following command:
sudo -u postgres createuser --interactive
This command will prompt you to enter the name of the new user and specify whether the user should be a superuser, allowed to create new databases, or allowed to create new roles.
Step 11: Create a PostgreSQL Database
To create a new PostgreSQL database, run the following command:
sudo -u postgres createdb dbname
Replace dbname with the name of the database that you want to create.
Step 12: Set a Password for the PostgreSQL User
By default, PostgreSQL does not require a password to connect to the server. To set a password for the PostgreSQL user, run the following command:
sudo -u postgres psql
This command will open the PostgreSQL command-line prompt. At the prompt, enter the following command to set a password for the user:
\password username
Replace the username with the name of the PostgreSQL user that you created in Step 10.
Step 13: Connect to the PostgreSQL Server
PostgreSQL server, use the psql command followed by the database name and the username:
psql dbname username
Replace dbname and username with the name of the database and the username that you created earlier.
Step 14: Test the PostgreSQL Installation
To test the PostgreSQL installation, create a simple table and insert some data into it. First, connect to the PostgreSQL server using the psql command as shown in Step 9. Then, create a new table using the following command:
CREATE TABLE test_table (id SERIAL PRIMARY KEY, name VARCHAR(50));
This command will create a new table called test_table with two columns: id and name. The id column is a serial column, which means that it will automatically generate a unique value for each row. The name column is a VARCHAR column, which can store up to 50 characters.
Next, insert some data into the table using the following command:
INSERT INTO test_table (name) VALUES ('John'), ('Jane'), ('Bob');
This command will insert three rows into the test_table table.
Finally, retrieve the data from the table using the following command:
SELECT * FROM test_table;
This command will display the contents of the test_table table:
id | name
----+------
1 | John
2 | Jane
3 | Bob
(3 rows)
If you see the data displayed as expected, then your PostgreSQL installation is working correctly.
Conclusion
In this tutorial, we learned how to install PostgreSQL 12 on Fedora 33. We also learned how to initialize the database cluster, start and enable the PostgreSQL service, configure PostgreSQL, create a PostgreSQL user and database, set a password for the PostgreSQL user, connect to the PostgreSQL server, and test the PostgreSQL installation. PostgreSQL is a powerful and flexible database management system that can handle a wide range of applications. By following the steps in this tutorial, you can quickly set up a PostgreSQL server on your Fedora 33 system and start building your applications.
End of the tutorial, you have learned how to install PostgreSQL 12 on Fedora 33.
See also:
PostgreSQL commands with examples


