In this tutorial, we’ll explain how to install Nagios on CentOS 7. Nagios is a free monitoring tool, It is Open source software that offers to monitor and alert services for switches, servers, applications and services.
Prerequisites to install Nagios on CentOS 7
- CentOS 7 Operating system installed machine
- Need Sudo / Root access privileges
- Login to CentOS SSH or GUI
Steps to install Nagios on CentOS 7
Step 1: Disable SELinux On CentOS
$ sudo setenforce 0
[root@CentOS-7 ~]# getenforce
Enforcing
[root@CentOS-7 ~]# setenforce 0
[root@CentOS-7 ~]#
[root@CentOS-7 ~]# getenforce
Permissive
[root@CentOS-7 ~]#
The above command only disables SELinux temporarily, to disable SELinux permanently on CentOS 7 run the below command.
$ sudo sed -i 's/SELINUX=.*/SELINUX=disabled/g' /etc/selinux/config
Demo output
[root@CentOS-7 ~]# cat /etc/selinux/config | grep SELINUX
# SELINUX= can take one of these three values:
SELINUX=enforcing
# SELINUXTYPE= can take one of three values:
SELINUXTYPE=targeted
[root@CentOS-7 ~]#
[root@CentOS-7 ~]# sudo sed -i 's/SELINUX=.*/SELINUX=disabled/g' /etc/selinux/config

[root@CentOS-7 ~]#

[root@CentOS-7 ~]# cat /etc/selinux/config | grep SELINUX

# SELINUX=disabled

SELINUX=disabled

# SELINUXTYPE= can take one of three values:

SELINUXTYPE=targeted

[root@CentOS-7 ~]#
Another method to disable SELinux by editing SELinux config file “/etc/selinux/config” manually and update the value of SELinux to “disabled”.
Step 2: Update CentOS packages and security patches
$ sudo yum update
Step 3: Install the prerequisite packages
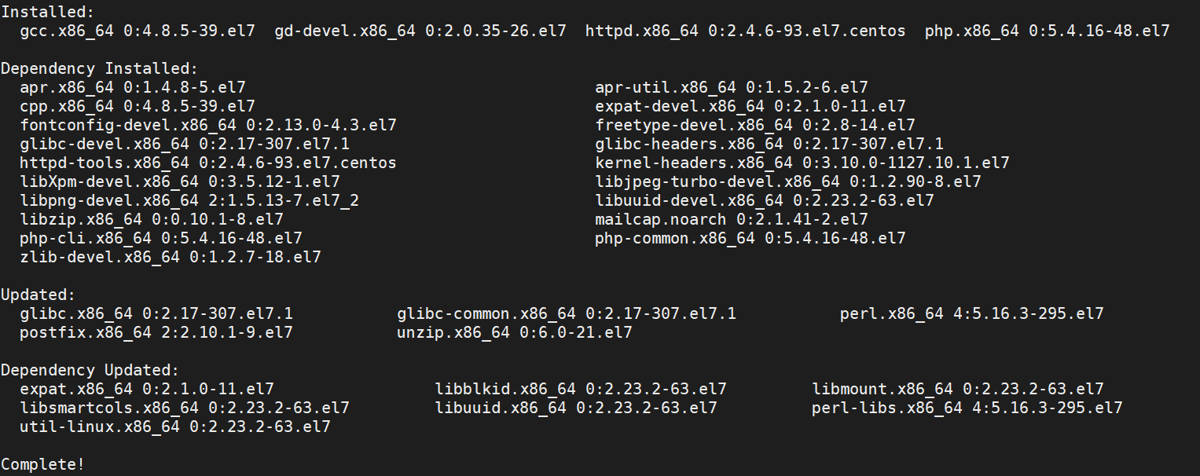
$ sudo yum install gcc glibc glibc-common wget unzip httpd php gd gd-devel perl postfix
Step 4: Download Nagios source file
$ cd /usr/src/

$ sudo wget -O nagioscore.tar.gz https://github.com/NagiosEnterprises/nagioscore/archive/nagios-4.4.5.tar.gz

$ sudo tar xzf nagioscore.tar.gz
For the latest version of Nagios checkout GitHub repository
Step 5: Compiling Nagios
$ cd nagioscore-nagios-*/

$ ./configure
this configure script will check and make sure all dependencies on your system are available.
Demo output
*** Configuration summary for nagios 4.4.5 2019-08-20 ***:

 General Options:
 -------------------------
        Nagios executable:  nagios
        Nagios user/group:  nagios,nagios
       Command user/group:  nagios,nagios
             Event Broker:  yes
        Install ${prefix}:  /usr/local/nagios
    Install ${includedir}:  /usr/local/nagios/include/nagios
                Lock file:  /run/nagios.lock
   Check result directory:  /usr/local/nagios/var/spool/checkresults
           Init directory:  /lib/systemd/system
  Apache conf.d directory:  /etc/httpd/conf.d
             Mail program:  /bin/mail
                  Host OS:  linux-gnu
          IOBroker Method:  epoll

 Web Interface Options:
 ------------------------
                 HTML URL:  http://localhost/nagios/
                  CGI URL:  http://localhost/nagios/cgi-bin/
 Traceroute (used by WAP):  /bin/traceroute
Start the compilation with “make all” command
$ sudo make all
Demo output
…
…
*** Compile finished ***

If the main program and CGIs compiled without any errors, you
can continue with testing or installing Nagios as follows (type
'make' without any arguments for a list of all possible options):
…
…
Step 6: Create Nagios User and Group
$ sudo make install-groups-users
Demo Output
[root@CentOS-7 nagioscore-nagios-4.4.5]#  sudo make install-groups-users
groupadd -r nagios
useradd -g nagios nagios
[root@CentOS-7 nagioscore-nagios-4.4.5]#
Step 7: Add apache user to the Nagios groups
$ sudo usermod -a -G nagios apache
Step 8: Install Nagios Binaries, HTML and CGIs files.
$ sudo make install
Demo Output
…
...
*** Main program, CGIs and HTML files installed ***

You can continue with installing Nagios as follows (type 'make'
without any arguments for a list of all possible options):
…
…
Step 9: Install Daemon and enable service to start on boot.
$ sudo make install-daemoninit

$ systemctl enable httpd.service
[root@CentOS-7 nagioscore-nagios-4.4.5]# sudo make install-daemoninit

/bin/install -c -m 755 -d -o root -g root /lib/systemd/system

/bin/install -c -m 755 -o root -g root startup/default-service /lib/systemd/system/nagios.service

Created symlink from /etc/systemd/system/multi-user.target.wants/nagios.service to /usr/lib/systemd/system/nagios.service.

*** Init script installed ***

[root@CentOS-7 nagioscore-nagios-4.4.5]#

[root@CentOS-7 nagioscore-nagios-4.4.5]# systemctl enable httpd.service

Created symlink from /etc/systemd/system/multi-user.target.wants/httpd.service to /usr/lib/systemd/system/httpd.service.

[root@CentOS-7 nagioscore-nagios-4.4.5]#
Step 10: Install Command Mode
$ sudo make install-commandmode
Demo output
[root@CentOS-7 nagioscore-nagios-4.4.5]#  sudo make install-commandmode

/bin/install -c -m 775 -o nagios -g nagios -d /usr/local/nagios/var/rw

chmod g+s /usr/local/nagios/var/rw

*** External command directory configured ***

[root@CentOS-7 nagioscore-nagios-4.4.5]#
Step 11: Install sample config file
$ sudo make install-config
Demo Output
Step 12: Install Apache Config Files
$ sudo make install-webconf
Demo output
[root@CentOS-7 nagioscore-nagios-4.4.5]# sudo make install-webconf

/bin/install -c -m 644 sample-config/httpd.conf /etc/httpd/conf.d/nagios.conf

if [ 0 -eq 1 ]; then \

        ln -s /etc/httpd/conf.d/nagios.conf /etc/apache2/sites-enabled/nagios.conf; \

fi

*** Nagios/Apache conf file installed ***

[root@CentOS-7 nagioscore-nagios-4.4.5]#
Step 13: Configure Firewall and open port 80 for inbound traffic
$ sudo firewall-cmd --zone=public --add-port=80/tcp

$ sudo firewall-cmd --zone=public --add-port=80/tcp --permanent

$ sudo firewall-cmd --reload
Demo output
[root@CentOS-7 nagioscore-nagios-4.4.5]# sudo firewall-cmd --zone=public --add-port=80/tcp
success
[root@CentOS-7 nagioscore-nagios-4.4.5]# sudo firewall-cmd --zone=public --add-port=80/tcp --permanent
success
[root@CentOS-7 nagioscore-nagios-4.4.5]# sudo firewall-cmd --reload
success
[root@CentOS-7 nagioscore-nagios-4.4.5]#
Step 14: Create Nagios Web login user
$ sudo htpasswd -c /usr/local/nagios/etc/htpasswd.users nagiosadmin
this is the apache user which is required to login Nagios UI
Demo Output:
[root@CentOS-7 nagioscore-nagios-4.4.5]# sudo htpasswd -c /usr/local/nagios/etc/htpasswd.users nagiosadmin
New password:
Re-type new password:
Adding password for user nagiosadmin
[root@CentOS-7 nagioscore-nagios-4.4.5]#
Step 15: Restart the Apache service
$ sudo systemctl restart httpd
Step 16: Verify Nagios Installation
goto any web browser and access Nagios Dashboard : http://<your-centos-ip>/nagios/
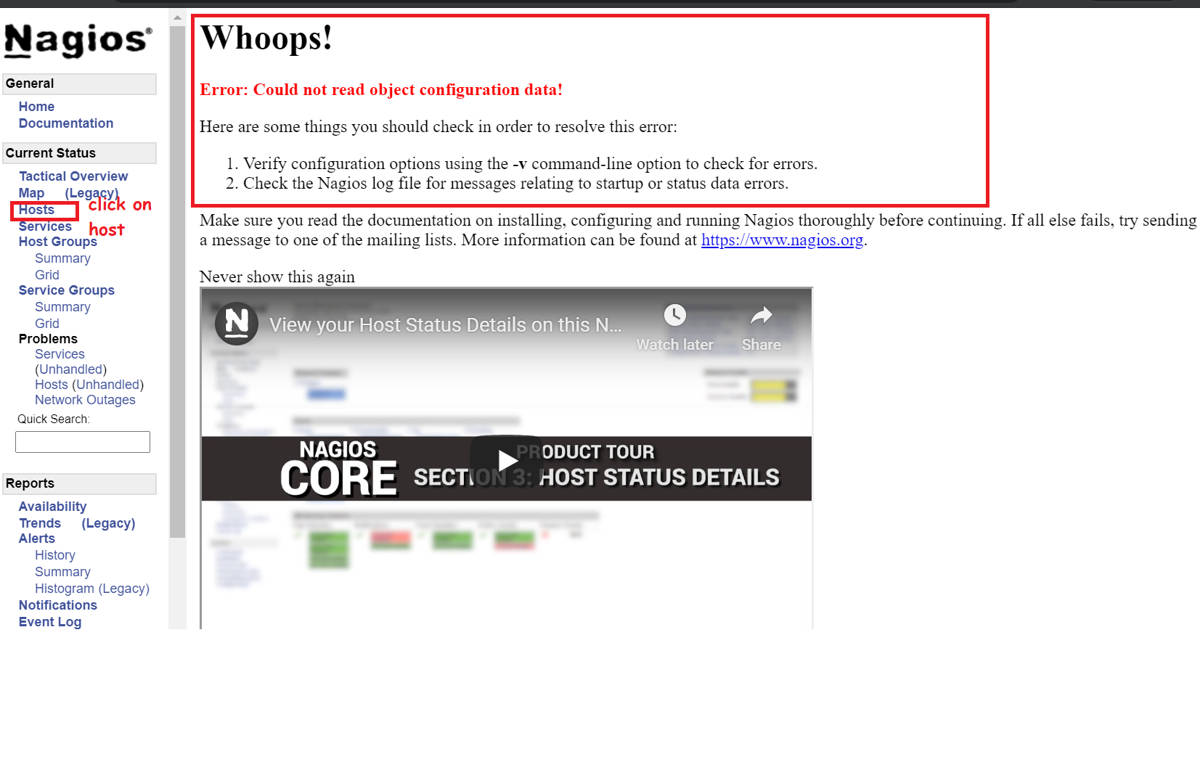
you may get some errors in hosts tab, because you have not install any plugins follow below steps to install the Nagios plugin.
Steps to Install Nagios Plugins
Step 1: Prerequisites to install Nagios Plugins
sudo yum install -y gcc glibc glibc-common make gettext automake autoconf wget openssl-devel net-snmp net-snmp-utils epel-release

sudo yum install -y perl-Net-SNMP
Step 2: Download Nagios plugin source file and extract the tar file
$ cd /usr/src/

$ sudo wget --no-check-certificate -O nagios-plugins.tar.gz https://github.com/nagios-plugins/nagios-plugins/archive/release-2.2.1.tar.gz

$ sudo tar zxf nagios-plugins.tar.gz

$ cd nagios-plugins-release-2.2.1Step 3: Compile and Install Nagios plugin
$ sudo ./tools/setup

$ sudo ./configure

$ sudo make

$ sudo make install
Step 4: Restart the Nagios service
$ sudo systemctl restart nagios
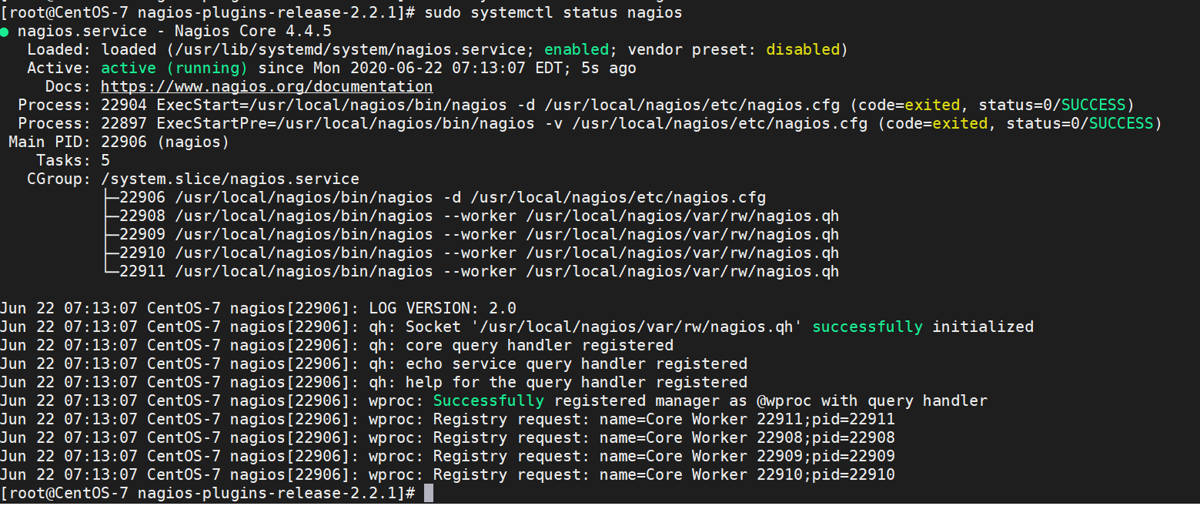
Step 5: Verify Nagios service status
$ sudo systemctl status nagios
Demo output
Step 6: Access Nagios Web Interface
http(s)://your_centos_ip_or_domain_or_ip_address/nagios
Enter the credentials which we have created in the above steps
http://add the URL from the above table of content of step 14
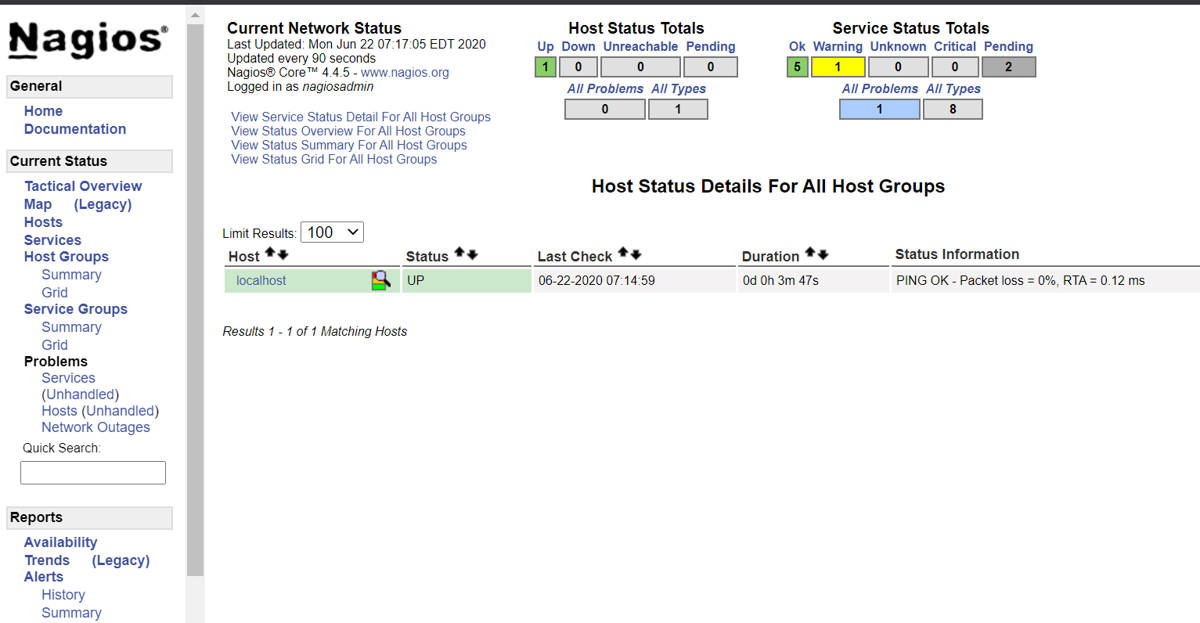
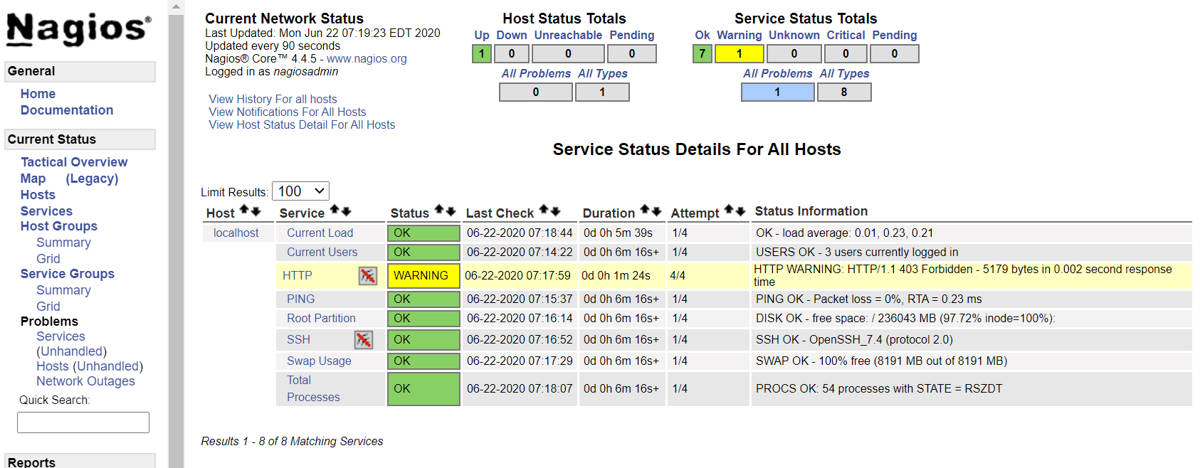
Now, go to hosts, and you will see hosts which are added to Nagios server and the previous error which you got in step 16 is resolved now.
Goto Service tab, and you will find all their service which are monitored
You have successfully installed Nagios on CentOS 7.
End of the tutorial, you have learned How to Install Nagios on CentOS 7.
