In this article, you’ll learn how to install and configure vsFTPd on CentOS 7. FTP [File Transfer Protocol] is used for sending/transferring files over the web/internet this method is used over decades and in this article we’ll see about vsFTPd [Very Secure File Transfer Protocol Daemon].
Prerequisite
- Access to a CentOS machine with root or sudo privileges
- Text editor
Steps to Install and Configure vsFTPd on CentOS 7
If you are looking for a secure and reliable way to transfer files between different computers, then vsFTPd is an excellent choice. vsFTPd, or Very Secure FTP daemon, is an open-source FTP server that is widely used by many organizations around the world. In this blog, we will show you how to install and configure vsFTPd on CentOS 7.
Step 1: Install vsFTPd on CentOS
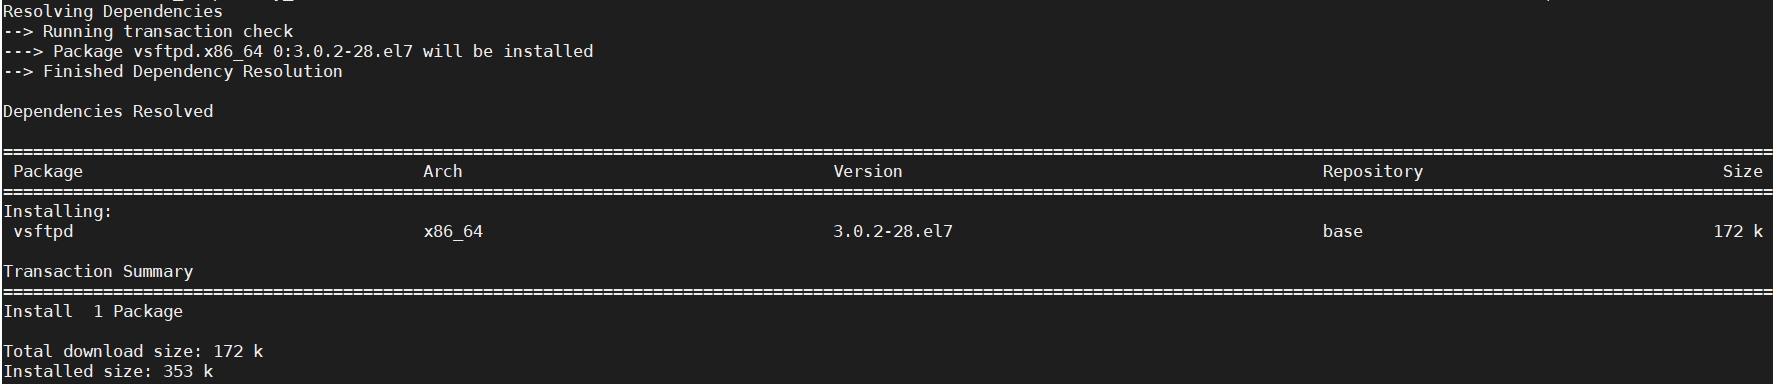
yum install -y vsftpd
Sample Output:
[root@centos ~]# yum install -y vsftpd
Loaded plugins: fastestmirror
Determining fastest mirrors
* base: mirror.bizflycloud.vn
* extras: mirrors.viethosting.com
* updates: centos.mirrors.estointernet.in
base | 3.6 kB 00:00:00
extras | 2.9 kB 00:00:00
updates | 2.9 kB 00:00:00
(1/4): base/7/x86_64/group_gz | 153 kB 00:00:00
(2/4): extras/7/x86_64/primary_db | 222 kB 00:00:01
(3/4): updates/7/x86_64/primary_db | 3.7 MB 00:00:02
(4/4): base/7/x86_64/primary_db | 6.1 MB 00:00:02
Resolving Dependencies
--> Running transaction check
---> Package vsftpd.x86_64 0:3.0.2-28.el7 will be installed
--> Finished Dependency Resolution

Dependencies Resolved

=============================================================================================
Package Arch Version Repository Size
=============================================================================================
Installing:
vsftpd x86_64 3.0.2-28.el7 base 172 k

Transaction Summary
=============================================================================================
Install 1 Package

Total download size: 172 k
Installed size: 353 k
Downloading packages:
warning: /var/cache/yum/x86_64/7/base/packages/vsftpd-3.0.2-28.el7.x86_64.rpm: Header V3 RSA/SHA256 Signature, key ID f4a80eb5: NOKEY
Public key for vsftpd-3.0.2-28.el7.x86_64.rpm is not installed
vsftpd-3.0.2-28.el7.x86_64.rpm | 172 kB 00:00:00
Retrieving key from file:///etc/pki/rpm-gpg/RPM-GPG-KEY-CentOS-7
Importing GPG key 0xF4A80EB5:
Userid : "CentOS-7 Key (CentOS 7 Official Signing Key) <security@centos.org>"
Package : centos-release-7-6.1810.2.el7.centos.x86_64 (installed)
From : /etc/pki/rpm-gpg/RPM-GPG-KEY-CentOS-7
Running transaction check
Running transaction test
Transaction test succeeded
Running transaction
Installing : vsftpd-3.0.2-28.el7.x86_64 1/1
Verifying : vsftpd-3.0.2-28.el7.x86_64 1/1

Installed:
vsftpd.x86_64 0:3.0.2-28.el7

Complete!
[root@centos ~]#
Step 2: Start the vsftpd service and auto start service on boot
sudo systemctl start vsftpd
sudo systemctl enable vsftpd

Sample Output
[root@centos ~]# sudo systemctl start vsftpd
[root@centos ~]# sudo systemctl enable vsftpd
Created symlink from /etc/systemd/system/multi-user.target.wants/vsftpd.service to /usr/lib/systemd/system/vsftpd.service.
[root@centos ~]#
Step 3: Install Firewall on CentOS
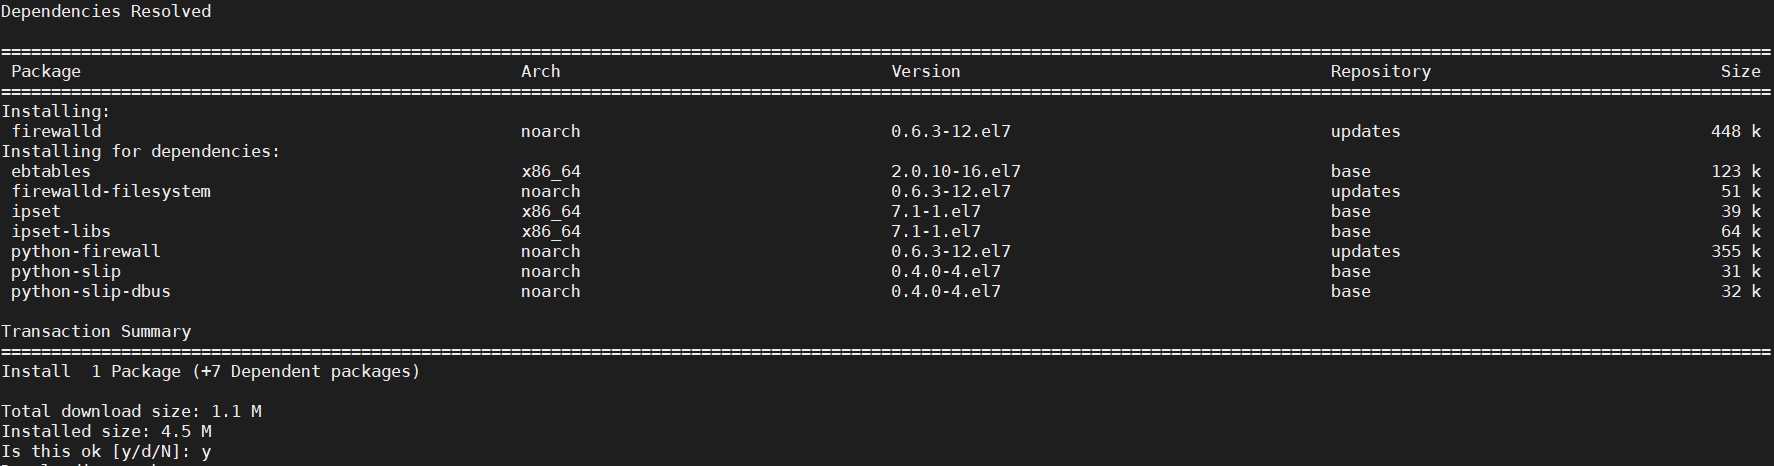
sudo yum install firewalld
Sample Output:
[root@centos ~]# sudo yum install firewalld
Loaded plugins: fastestmirror
Loading mirror speeds from cached hostfile
* base: mirror.bizflycloud.vn
* extras: mirrors.viethosting.com
* updates: centos.mirrors.estointernet.in
Resolving Dependencies
--> Running transaction check
---> Package firewalld.noarch 0:0.6.3-12.el7 will be installed
--> Processing Dependency: python-firewall = 0.6.3-12.el7 for package: firewalld-0.6.3-12.el7.noarch
--> Processing Dependency: firewalld-filesystem = 0.6.3-12.el7 for package: firewalld-0.6.3-12.el7.noarch
--> Processing Dependency: ipset for package: firewalld-0.6.3-12.el7.noarch
--> Processing Dependency: ebtables for package: firewalld-0.6.3-12.el7.noarch
--> Running transaction check
---> Package ebtables.x86_64 0:2.0.10-16.el7 will be installed
---> Package firewalld-filesystem.noarch 0:0.6.3-12.el7 will be installed
---> Package ipset.x86_64 0:7.1-1.el7 will be installed
--> Processing Dependency: ipset-libs(x86-64) = 7.1-1.el7 for package: ipset-7.1-1.el7.x86_64
--> Processing Dependency: libipset.so.13(LIBIPSET_4.8)(64bit) for package: ipset-7.1-1.el7.x86_64
--> Processing Dependency: libipset.so.13(LIBIPSET_2.0)(64bit) for package: ipset-7.1-1.el7.x86_64
--> Processing Dependency: libipset.so.13()(64bit) for package: ipset-7.1-1.el7.x86_64
---> Package python-firewall.noarch 0:0.6.3-12.el7 will be installed
--> Processing Dependency: python-slip-dbus for package: python-firewall-0.6.3-12.el7.noarch
--> Running transaction check
---> Package ipset-libs.x86_64 0:7.1-1.el7 will be installed
---> Package python-slip-dbus.noarch 0:0.4.0-4.el7 will be installed
--> Processing Dependency: python-slip = 0.4.0-4.el7 for package: python-slip-dbus-0.4.0-4.el7.noarch
--> Running transaction check
---> Package python-slip.noarch 0:0.4.0-4.el7 will be installed
--> Finished Dependency Resolution

Dependencies Resolved

=================================================================================================================
Package Arch Version Repository Size
=================================================================================================================
Installing:
firewalld noarch 0.6.3-12.el7 updates 448 k
Installing for dependencies:
ebtables x86_64 2.0.10-16.el7 base 123 k
firewalld-filesystem noarch 0.6.3-12.el7 updates 51 k
ipset x86_64 7.1-1.el7 base 39 k
ipset-libs x86_64 7.1-1.el7 base 64 k
python-firewall noarch 0.6.3-12.el7 updates 355 k
python-slip noarch 0.4.0-4.el7 base 31 k
python-slip-dbus noarch 0.4.0-4.el7 base 32 k

Transaction Summary
=================================================================================================================
Install 1 Package (+7 Dependent packages)

Total download size: 1.1 M
Installed size: 4.5 M
Is this ok [y/d/N]: y
Downloading packages:
(1/8): firewalld-filesystem-0.6.3-12.el7.noarch.rpm | 51 kB 00:00:00
(2/8): ebtables-2.0.10-16.el7.x86_64.rpm | 123 kB 00:00:00
(3/8): ipset-7.1-1.el7.x86_64.rpm | 39 kB 00:00:00
(4/8): ipset-libs-7.1-1.el7.x86_64.rpm | 64 kB 00:00:00
(5/8): python-slip-0.4.0-4.el7.noarch.rpm | 31 kB 00:00:00
(6/8): python-slip-dbus-0.4.0-4.el7.noarch.rpm | 32 kB 00:00:00
(7/8): firewalld-0.6.3-12.el7.noarch.rpm | 448 kB 00:00:00
(8/8): python-firewall-0.6.3-12.el7.noarch.rpm | 355 kB 00:00:00
---------------------------------------------------------------------------------------------------------------------------------------------------------------------------------
Total 1.8 MB/s | 1.1 MB 00:00:00
Running transaction check
Running transaction test
Transaction test succeeded
Running transaction
Installing : ebtables-2.0.10-16.el7.x86_64 1/8
Installing : ipset-libs-7.1-1.el7.x86_64 2/8
Installing : ipset-7.1-1.el7.x86_64 3/8
Installing : python-slip-0.4.0-4.el7.noarch 4/8
Installing : python-slip-dbus-0.4.0-4.el7.noarch 5/8
Installing : python-firewall-0.6.3-12.el7.noarch 6/8
Installing : firewalld-filesystem-0.6.3-12.el7.noarch 7/8
Installing : firewalld-0.6.3-12.el7.noarch 8/8
Verifying : firewalld-0.6.3-12.el7.noarch 1/8
Verifying : ipset-7.1-1.el7.x86_64 2/8
Verifying : firewalld-filesystem-0.6.3-12.el7.noarch 3/8
Verifying : python-firewall-0.6.3-12.el7.noarch 4/8
Verifying : python-slip-0.4.0-4.el7.noarch 5/8
Verifying : python-slip-dbus-0.4.0-4.el7.noarch 6/8
Verifying : ipset-libs-7.1-1.el7.x86_64 7/8
Verifying : ebtables-2.0.10-16.el7.x86_64 8/8

Installed:
firewalld.noarch 0:0.6.3-12.el7

Dependency Installed:
ebtables.x86_64 0:2.0.10-16.el7 firewalld-filesystem.noarch 0:0.6.3-12.el7 ipset.x86_64 0:7.1-1.el7 ipset-libs.x86_64 0:7.1-1.el7 python-firewall.noarch 0:0.6.3-12.el7
python-slip.noarch 0:0.4.0-4.el7 python-slip-dbus.noarch 0:0.4.0-4.el7

Complete!
[root@centos ~]#
[root@centos ~]# systemctl start firewalld
[root@centos ~]# systemctl enable firewalld
[root@centos ~]# systemctl status firewalld
● firewalld.service - firewalld - dynamic firewall daemon
Loaded: loaded (/usr/lib/systemd/system/firewalld.service; enabled; vendor preset: enabled)
Active: active (running) since Wed 2020-12-16 09:03:03 UTC; 17s ago
Docs: man:firewalld(1)
Main PID: 3811 (firewalld)
CGroup: /system.slice/firewalld.service
└─3811 /usr/bin/python2 -Es /usr/sbin/firewalld --nofork --nopid

Dec 16 09:03:03 centos.novalocal systemd[1]: Starting firewalld - dynamic firewall daemon...
Dec 16 09:03:03 centos.novalocal systemd[1]: Started firewalld - dynamic firewall daemon.
Dec 16 09:03:03 centos.novalocal firewalld[3811]: WARNING: AllowZoneDrifting is enabled. This is considered an insecure configuration option. It will be removed in ...ng it now.
Hint: Some lines were ellipsized, use -l to show in full.
[root@centos ~]#
Step 3: Configure the firewall by creating a rule to all FTP traffic.
Run below command to allow or add FTP with port 21 and reload the service.
sudo firewall-cmd --zone=public --permanent --add-port=21/tcp
sudo firewall-cmd --zone=public --permanent --add-service=ftp
sudo firewall-cmd --reload
Sample Output
[root@centos ~]# sudo firewall-cmd --zone=public --permanent --add-port=21/tcp
success
[root@centos ~]# sudo firewall-cmd --zone=public --permanent --add-service=ftp
success
[root@centos ~]# sudo firewall-cmd --reload
success
[root@centos ~]#
Step 4: Configure VSFTPD
locate vsftpd config file → ” /etc/vsftpd/vsftpd.conf “
Backup the current vsftpd conf file.
sudo cp -p /etc/vsftpd/vsftpd.conf /etc/vsftpd/vsftpd.conf.default
Edit the configuration, disable anonymous users, and allow local users.
vim /etc/vsftpd/vsftpd.conf
locate/find the below text and make the changes:
anonymous_enable=NO
local_enable=YES
Note: This is a crucial step. Anonymous access may be risky – you ought to avoid it unless you understand the risks.
Allow a logged-in user to upload files to your FTP server.
locate/find below the line and make the changes:
write_enable=YES
Configure FTP users to limit to their own home directory which is also known as jail or chroot jail.
chroot_local_user=YES
allow_writeable_chroot=YES
Use “user_sub_token” option for better security.
vsFTPd also provides a user list so that we can allow only specific/approved users. To use this option you need to enable “userlist_enable” entry as mentioned below.
userlist_enable=YES
userlist_file=/etc/vsftpd/user_list
userlist_deny=NO
locate to user_list file and allow the user to which you want to provide access please note only one user per line. If you want to deny a list of user then you need to set for option “userlist_deny” and the user which are in the list will be blocked.
Once you are done with the changes as per your requirement then you need to restart the vsftpd service.
Command to restart vsftpd service on CentOS
sudo systemctl restart vsftpd
Step 5: Create an FTP user
In this article, we are creating a user with a name “user1test” but you can create as per your requirement.
sudo adduser user1test
sudo passwd user1test

Sample Output:
[root@centos ~]# sudo adduser user1test
[root@centos ~]# sudo passwd user1test
Changing password for user user1test.
New password:
BAD PASSWORD: The password fails the dictionary check - it is based on a dictionary word
Retype new password:
passwd: all authentication tokens updated successfully.
[root@centos ~]#
Add user to the user list file “/etc/vsftpd/user_list”.
Run below command to create the required directory and permissions
sudo mkdir -p /home/user1test/ftp/upload
sudo chmod 550 /home/user1test/ftp
sudo chmod 750 /home/user1test/ftp/upload
sudo chown -R user1test: /home/user1test/ftp
Sample Output
[root@centos ~]# sudo mkdir -p /home/user1test/ftp/upload
[root@centos ~]# sudo chmod 550 /home/user1test/ftp
[root@centos ~]# sudo chmod 750 /home/user1test/ftp/upload
[root@centos ~]# sudo chown -R user1test: /home/user1test/ftp
[root@centos ~]#
Step 6: Configure SELinux to secure FTP Server
Allow FTP to read/write files from user’s home directory.
setsebool -P <user’s-home-dir> on

semanage boolean -m ftpd_full_access --on
Sample Output:
[root@centos ~]# setsebool -P /home/user1test/ on
Boolean /home/user1test/ is not defined
[root@centos ~]# semanage boolean -m ftpd_full_access --on
[root@centos ~]#
Now connect to FTP server with the user which you have created.
ftp <ftp-server-ip>
or
ftp command is not installed run the below command.
yum install ftp -y
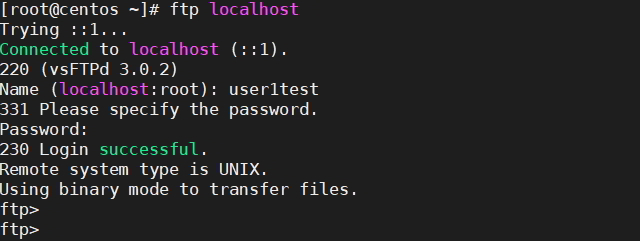
How to test ftp locally.
ftp localhost
Congratulations! You have now installed and configured vsFTPd on CentOS 7. You can now use this secure and reliable FTP server to transfer files between different computers.
Troubleshooting steps:
Error: 421 Service not available, remote server has closed connection
Solution:
- Either you turn off SELinux (not recommended)
- Perform the SELinux Steps as mentioned in the above steps
FAQ’s
Q: What is vsFTPd?
A: vsFTPd is a popular open-source FTP server that provides a secure and reliable way to transfer files between computers.
Q: What operating systems can vsFTPd be installed on?
A: vsFTPd can be installed on a variety of Linux and Unix operating systems, including CentOS, Ubuntu, Debian, and Red Hat Enterprise Linux.
Q: Is vsFTPd secure?
A: Yes, vsFTPd is considered to be a very secure FTP server. It includes many security features, such as chroot jail, SSL/TLS encryption, and IP-based access control.
Q: Can vsFTPd be used to transfer files anonymously?
A: Yes, vsFTPd can be configured to allow anonymous FTP connections. However, this is generally not recommended for security reasons.
Q: What FTP clients can be used to connect to vsFTPd?
A: Any FTP client can be used to connect to vsFTPd. Some popular FTP clients include FileZilla, WinSCP, and Cyberduck.
Q: How do I configure vsFTPd to allow local users to access the FTP server?
A: In the vsFTPd configuration file, set the “local_enable” option to “YES”.
Q: How do I configure vsFTPd to restrict users to their home directories?
A: In the vsFTPd configuration file, set the “chroot_local_user” option to “YES”.
Q: How do I start and stop the vsFTPd service?
A: To start the vsFTPd service, use the command “sudo systemctl start vsftpd”. To stop the vsFTPd service, use the command “sudo systemctl stop vsftpd”.
Q: Can vsFTPd be used with a firewall?
A: Yes, vsFTPd can be used with a firewall. You will need to configure your firewall to allow FTP traffic.
Q: Is vsFTPd suitable for use in a production environment?
A: Yes, vsFTPd is commonly used in production environments and is considered to be a stable and reliable FTP server.
End of article. you have learned how to install and configure vsFTPd on CentOS 7.
See Also:
How to install Redis on Amazon Linux or CentOS