Redis is an open-source in-memory data structure store, used as a database, cache, and message broker. It supports a variety of data structures such as strings, hashes, lists, sets, and sorted sets. Redis may be used with a variety of programming languages, including Python, Java, PHP, and Node.js. In this article, we will discuss how to install and secure Redis on Rocky Linux 8.
Rocky Linux is a community-driven, enterprise-grade operating system that is designed to be a stable and reliable platform for servers and workstations. It is based on the Red Hat Enterprise Linux (RHEL) source code and provides long-term support for its users.
Step-by-Step Guide: Install and Secure Redis on Rocky Linux 8
Prerequisites
Before proceeding with the installation of Redis, you need to have the following prerequisites:
- A Rocky Linux 8 server with sudo privileges
- A non-root user with sudo privileges
- Basic knowledge of Rocky Linux command-line interface (CLI)
Step 1: Install Redis on Rocky Linux 8
The first step is to install Redis on your Rocky Linux 8 server. Redis is available in the default Rocky Linux 8 repository, so you can install it using the dnf package manager.
Step 1.1: Update your package repository cache
sudo dnf update
Step 1.2: Install Redis
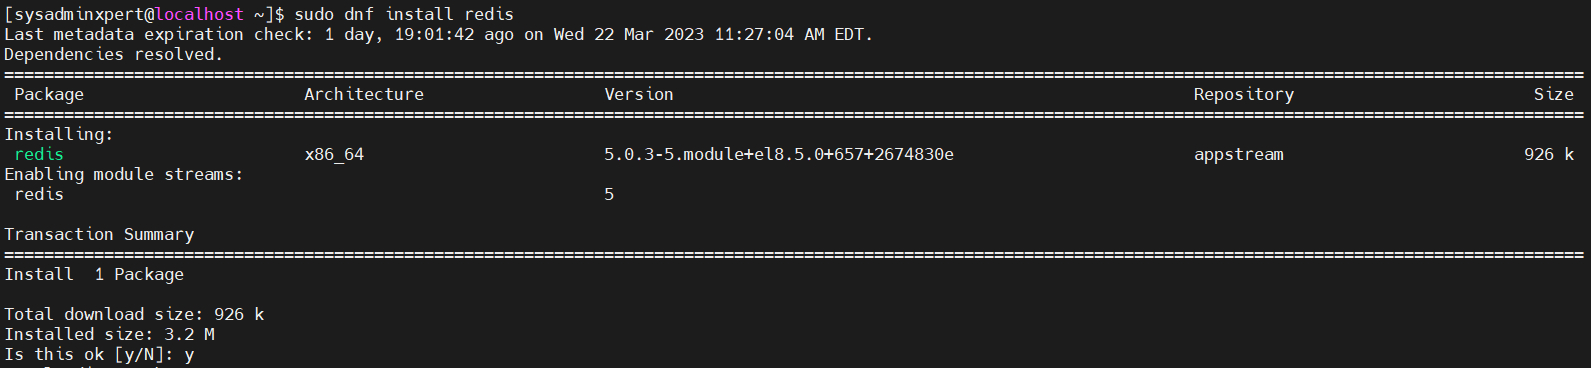
sudo dnf install redis
Sample Output:
[sysadminxpert@localhost ~]$ sudo dnf install redis
Last metadata expiration check: 1 day, 19:01:42 ago on Wed 22 Mar 2023 11:27:04 AM EDT.
Dependencies resolved.
==============================================================================================================================================================
Package Architecture Version Repository Size
==============================================================================================================================================================
Installing:
redis x86_64 5.0.3-5.module+el8.5.0+657+2674830e appstream 926 k
Enabling module streams:
redis 5

Transaction Summary
==============================================================================================================================================================
Install 1 Package

Total download size: 926 k
Installed size: 3.2 M
Is this ok [y/N]: y
Downloading Packages:
redis-5.0.3-5.module+el8.5.0+657+2674830e.x86_64.rpm 149 kB/s | 926 kB 00:06
--------------------------------------------------------------------------------------------------------------------------------------------------------------
Total 76 kB/s | 926 kB 00:12
Running transaction check
Transaction check succeeded.
Running transaction test
Transaction test succeeded.
Running transaction
Preparing : 1/1
Running scriptlet: redis-5.0.3-5.module+el8.5.0+657+2674830e.x86_64 1/1
Installing : redis-5.0.3-5.module+el8.5.0+657+2674830e.x86_64 1/1
Running scriptlet: redis-5.0.3-5.module+el8.5.0+657+2674830e.x86_64 1/1
Verifying : redis-5.0.3-5.module+el8.5.0+657+2674830e.x86_64 1/1

Installed:
redis-5.0.3-5.module+el8.5.0+657+2674830e.x86_64

Complete!
[sysadminxpert@localhost ~]$
This command will install Redis along with its dependencies.
Step 2: Configure Redis
Once Redis is installed, you need to configure it for your environment. The Redis configuration file is located at /etc/redis.conf. You can use any text editor to edit the file. In this example, we will use the vim editor.
1. Open the Redis configuration file:
sudo vim /etc/redis.conf
2. Configure Redis according to your needs. The default configuration should work for most environments. However, you may want to change some settings depending on your use case. Here are some important settings you may want to consider:
bind: This setting specifies the IP address or hostname on which Redis will listen for incoming connections. By default, Redis listens on all interfaces. If you want to restrict access to Redis, you can set this to the IP address of your server.
port: This setting specifies the TCP port on which Redis will listen for incoming connections. The default port is 6379. If you want to use a different port, you can change this setting.
requirepass: This setting specifies the password required to access Redis. By default, Redis does not require a password. If you want to secure Redis, you should set a strong password here.
maxmemory: This setting specifies the maximum amount of memory Redis can use for data storage. By default, Redis will use all available memory. If you want to limit the amount of memory Redis uses, you can set this to a lower value.
3. Save the changes to the configuration file and exit the text editor.
Step 3: Start Redis
Now that Redis is installed and configured, you can start it up.
Step 3.1: Start the Redis service
sudo systemctl start redis
Step 3.2: Enable Redis service
sudo systemctl enable --now redis
Step 3.3: Verify that Redis is running
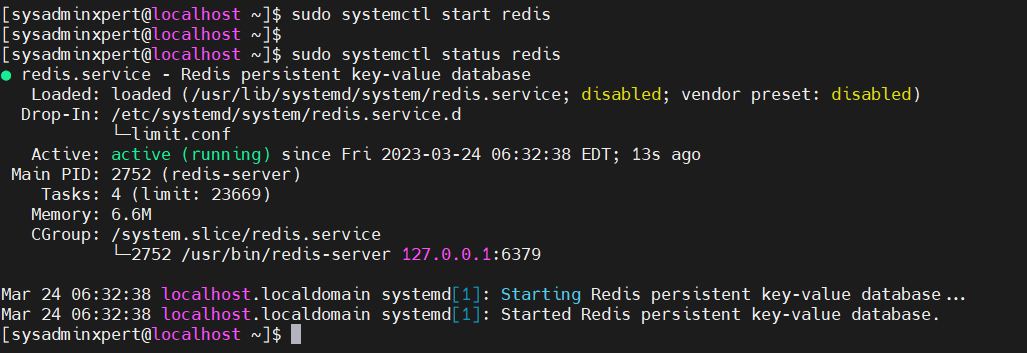
sudo systemctl status redis
You should see the output indicating that Redis is running:
[sysadminxpert@localhost ~]$ sudo systemctl status redis
● redis.service - Redis persistent key-value database
Loaded: loaded (/usr/lib/systemd/system/redis.service; disabled; vendor preset: disabled)
Drop-In: /etc/systemd/system/redis.service.d
└─limit.conf
Active: active (running) since Fri 2023-03-24 06:32:38 EDT; 13s ago
Main PID: 2752 (redis-server)
Tasks: 4 (limit: 23669)
Memory: 6.6M
CGroup: /system.slice/redis.service
└─2752 /usr/bin/redis-server 127.0.0.1:6379

Mar 24 06:32:38 localhost.localdomain systemd[1]: Starting Redis persistent key-value database...
Mar 24 06:32:38 localhost.localdomain systemd[1]: Started Redis persistent key-value database.
[sysadminxpert@localhost ~]$
If Redis is not running, check the logs for errors:
sudo journalctl -u redis
Step 4: Secure Redis
By default, Redis does not have any security features enabled. It is important to secure Redis to prevent unauthorized access to your data. Here are some best practices for securing Redis:
Step 4.1: Change the Redis default password & Enable Redis authentication:
Redis has built-in support for authentication, which allows you to require a password for access to Redis. To enable authentication, you need to add the requirepass setting to the Redis configuration file and set it to a strong password.
sudo vim /etc/redis.conf
Find the line that starts with # requirepass and uncomment it by removing the # symbol. Replace the password with a strong password.
requirepass your-strong-password
Save the changes to the configuration file and exit the text editor. Then restart the Redis service for the changes to take effect.
sudo systemctl restart redis
Once you have changed the Redis default password, you will need to use the new password to access Redis. It is important to choose a strong password that is difficult to guess or crack, and to keep the password secure.
Step 4.2: Limit access to Redis
You can limit access to Redis by changing the bind setting in the Redis configuration file. By default, Redis listens on all interfaces. If you want to restrict access to Redis, you can set this to the IP address of your server.
bind your-server-ip
This will limit access to Redis to only the IP address of your server.
Step 4.3: Configure the firewall
You can also use a firewall to limit access to Redis. Rocky Linux 8 comes with the firewalld firewall installed by default. You can configure the firewall to allow only specific IP addresses to access Redis.
sudo firewall-cmd --zone=public --add-port=6379/tcp --permanent

sudo firewall-cmd --zone=public --add-source=your-ip-address --permanent

sudo firewall-cmd --reload
Replace your-ip-address with the IP address you want to allow access to Redis.
Step 4.4: Monitor Redis
Monitoring Redis is important to detect and prevent unauthorized access or data breaches. You can use Redis’ built-in monitoring features to monitor Redis activity.
redis-cli monitor
This will display a live stream of Redis commands and responses.
Steps to Enable Redis Service to listen on all interfaces
By default, Redis service listens on 127.0.0.1.
$ ss -tunelp | grep 6379
Sample Output:
[sysadminxpert@localhost ~]$ ss -tunelp | grep 6379
tcp LISTEN 0 128 127.0.0.1:6379 0.0.0.0:* uid:986 ino:36278 sk:9 <->
[sysadminxpert@localhost ~]$
You can update redis configuration to listen on all remote client connections.
sudo vim /etc/redis.conf
The line to change is “bind 127.0.0.1” to below:
bind 0.0.0.0
Restart Redis service:
sudo systemctl restart redis
Confirm if Redis Server is now listening on the new bind address.
$ ss -tunelp | grep 6379
Sample output:
[sysadminxpert@localhost ~]$ ss -tunelp | grep 6379
tcp LISTEN 0 128 0.0.0.0:6379 0.0.0.0:* uid:986 ino:40050 sk:d <->
[sysadminxpert@localhost ~]$
Connect to Redis Server from CLI
$ redis-cli ping
Sample output:
[sysadminxpert@localhost ~]$ redis-cli ping
PONG
[sysadminxpert@localhost ~]$
This should return a “PONG” response if the Redis server is running and the connection is working properly.
Check Redis information.
redis-cli
Sample Output:
[sysadminxpert@localhost ~]$ redis-cli
127.0.0.1:6379> INFO SERVER
# Server
redis_version:5.0.3
redis_git_sha1:00000000
redis_git_dirty:0
redis_build_id:7fa21edfc0646001
redis_mode:standalone
os:Linux 4.18.0-305.3.1.el8_4.x86_64 x86_64
arch_bits:64
multiplexing_api:epoll
atomicvar_api:atomic-builtin
gcc_version:8.4.1
process_id:2936
run_id:37f8a2eab9f34f629d4d73f55865b28b9069eaae
tcp_port:6379
uptime_in_seconds:91
uptime_in_days:0
hz:10
configured_hz:10
lru_clock:1934669
executable:/usr/bin/redis-server
config_file:/etc/redis.conf
127.0.0.1:6379>
Steps to perform a basic benchmark with redis-benchmark
Redis provides a built-in benchmarking tool called redis-benchmark that can be used to measure the performance of a Redis server. The tool generates a specified number of requests for a specified number of clients and reports various metrics, such as throughput, latency, and CPU usage.
1. Open your terminal or command prompt.
2. Type the following command to start the benchmark tool:
redis-benchmark
This will run the benchmark with the default settings, which will generate 50,000 requests for 50 clients using 16-byte values.
3. You can customize the benchmark settings by passing command-line options. For example, to generate 100,000 requests for 100 clients using 32-byte values, you can use the following command:
redis-benchmark -n 100000 -c 100 -d 32
Here, -n specifies the number of requests, -c specifies the number of clients, and -d specifies the size of the values in bytes.
4. Once the benchmark is complete, the tool will display various metrics for example:
====== benchmark ======
[sysadminxpert@localhost ~]$ redis-benchmark -n 100000 -c 100 -d 32
====== PING_INLINE ======
100000 requests completed in 0.80 seconds
100 parallel clients
32 bytes payload
keep alive: 1

98.49% <= 1 milliseconds
99.65% <= 2 milliseconds
99.86% <= 3 milliseconds
99.98% <= 4 milliseconds
100.00% <= 4 milliseconds
125628.14 requests per second

====== PING_BULK ======
100000 requests completed in 0.80 seconds
100 parallel clients
32 bytes payload
keep alive: 1

99.21% <= 1 milliseconds
99.73% <= 2 milliseconds
100.00% <= 3 milliseconds
100.00% <= 3 milliseconds
125313.29 requests per second

====== SET ======
100000 requests completed in 0.79 seconds
100 parallel clients
32 bytes payload
keep alive: 1

97.87% <= 1 milliseconds
99.59% <= 2 milliseconds
99.84% <= 3 milliseconds
100.00% <= 3 milliseconds
125944.58 requests per second

====== GET ======
100000 requests completed in 0.78 seconds
100 parallel clients
32 bytes payload
keep alive: 1

98.81% <= 1 milliseconds
99.85% <= 2 milliseconds
99.98% <= 3 milliseconds
100.00% <= 3 milliseconds
128205.13 requests per second

====== INCR ======
100000 requests completed in 0.77 seconds
100 parallel clients
32 bytes payload
keep alive: 1

99.31% <= 1 milliseconds
99.89% <= 2 milliseconds
100.00% <= 2 milliseconds
130548.30 requests per second

====== LPUSH ======
100000 requests completed in 0.77 seconds
100 parallel clients
32 bytes payload
keep alive: 1

96.91% <= 1 milliseconds
100.00% <= 2 milliseconds
100.00% <= 2 milliseconds
130208.34 requests per second

====== RPUSH ======
100000 requests completed in 0.75 seconds
100 parallel clients
32 bytes payload
keep alive: 1

99.04% <= 1 milliseconds
100.00% <= 1 milliseconds
133155.80 requests per second

====== LPOP ======
100000 requests completed in 0.73 seconds
100 parallel clients
32 bytes payload
keep alive: 1

97.77% <= 1 milliseconds
99.90% <= 2 milliseconds
100.00% <= 3 milliseconds
100.00% <= 3 milliseconds
137741.05 requests per second

====== RPOP ======
100000 requests completed in 0.79 seconds
100 parallel clients
32 bytes payload
keep alive: 1

97.78% <= 1 milliseconds
99.89% <= 2 milliseconds
100.00% <= 2 milliseconds
127226.46 requests per second

====== SADD ======
100000 requests completed in 0.80 seconds
100 parallel clients
32 bytes payload
keep alive: 1

99.32% <= 1 milliseconds
99.57% <= 2 milliseconds
99.98% <= 3 milliseconds
100.00% <= 3 milliseconds
125156.45 requests per second

====== HSET ======
100000 requests completed in 0.78 seconds
100 parallel clients
32 bytes payload
keep alive: 1

99.34% <= 1 milliseconds
99.73% <= 2 milliseconds
99.90% <= 3 milliseconds
100.00% <= 3 milliseconds
128700.12 requests per second

====== SPOP ======
100000 requests completed in 0.79 seconds
100 parallel clients
32 bytes payload
keep alive: 1

99.49% <= 1 milliseconds
99.77% <= 2 milliseconds
99.90% <= 3 milliseconds
100.00% <= 3 milliseconds
127064.80 requests per second

====== LPUSH (needed to benchmark LRANGE) ======
100000 requests completed in 0.76 seconds
100 parallel clients
32 bytes payload
keep alive: 1

98.10% <= 1 milliseconds
99.88% <= 2 milliseconds
99.97% <= 3 milliseconds
100.00% <= 3 milliseconds
131233.59 requests per second

====== LRANGE_100 (first 100 elements) ======
100000 requests completed in 1.42 seconds
100 parallel clients
32 bytes payload
keep alive: 1

65.63% <= 1 milliseconds
98.36% <= 2 milliseconds
99.93% <= 3 milliseconds
100.00% <= 4 milliseconds
70422.54 requests per second

====== LRANGE_300 (first 300 elements) ======
100000 requests completed in 5.65 seconds
100 parallel clients
32 bytes payload
keep alive: 1

0.13% <= 1 milliseconds
10.35% <= 2 milliseconds
37.79% <= 3 milliseconds
63.44% <= 4 milliseconds
79.70% <= 5 milliseconds
90.03% <= 6 milliseconds
96.23% <= 7 milliseconds
98.65% <= 8 milliseconds
99.52% <= 9 milliseconds
99.81% <= 10 milliseconds
99.94% <= 11 milliseconds
99.99% <= 12 milliseconds
100.00% <= 13 milliseconds
17695.98 requests per second

====== LRANGE_500 (first 450 elements) ======
100000 requests completed in 9.65 seconds
100 parallel clients
32 bytes payload
keep alive: 1

0.05% <= 1 milliseconds
1.42% <= 2 milliseconds
8.66% <= 3 milliseconds
23.82% <= 4 milliseconds
39.10% <= 5 milliseconds
52.63% <= 6 milliseconds
64.67% <= 7 milliseconds
76.08% <= 8 milliseconds
85.70% <= 9 milliseconds
92.09% <= 10 milliseconds
96.16% <= 11 milliseconds
98.02% <= 12 milliseconds
98.92% <= 13 milliseconds
99.46% <= 14 milliseconds
99.67% <= 15 milliseconds
99.81% <= 16 milliseconds
99.93% <= 17 milliseconds
99.97% <= 18 milliseconds
99.98% <= 19 milliseconds
99.99% <= 20 milliseconds
99.99% <= 22 milliseconds
100.00% <= 22 milliseconds
10366.99 requests per second

====== LRANGE_600 (first 600 elements) ======
100000 requests completed in 10.62 seconds
100 parallel clients
32 bytes payload
keep alive: 1

0.05% <= 1 milliseconds
1.12% <= 2 milliseconds
5.98% <= 3 milliseconds
17.94% <= 4 milliseconds
32.87% <= 5 milliseconds
44.51% <= 6 milliseconds
55.70% <= 7 milliseconds
67.13% <= 8 milliseconds
78.14% <= 9 milliseconds
87.17% <= 10 milliseconds
92.94% <= 11 milliseconds
96.13% <= 12 milliseconds
98.14% <= 13 milliseconds
99.15% <= 14 milliseconds
99.57% <= 15 milliseconds
99.82% <= 16 milliseconds
99.92% <= 17 milliseconds
99.95% <= 18 milliseconds
99.97% <= 19 milliseconds
99.99% <= 20 milliseconds
99.99% <= 21 milliseconds
99.99% <= 22 milliseconds
100.00% <= 24 milliseconds
100.00% <= 25 milliseconds
9417.97 requests per second

====== MSET (10 keys) ======
100000 requests completed in 1.12 seconds
100 parallel clients
32 bytes payload
keep alive: 1

86.38% <= 1 milliseconds
98.16% <= 2 milliseconds
99.72% <= 3 milliseconds
99.83% <= 5 milliseconds
99.89% <= 6 milliseconds
99.93% <= 7 milliseconds
100.00% <= 7 milliseconds
89126.56 requests per second

[sysadminxpert@localhost ~]$
For example Redis benchmark commands
Run the benchmark with the default configuration against 127.0.0.1:6379:
$ redis-benchmark
Use 20 parallel clients, for a total of 100k requests, against 192.168.1.1:
$ redis-benchmark -h 192.168.1.1 -p 6379 -n 100000 -c 20
Fill 127.0.0.1:6379 with about 1 million keys only using the SET test:
$ redis-benchmark -t set -n 1000000 -r 100000000
Benchmark 127.0.0.1:6379 for a few commands producing CSV output:
$ redis-benchmark -t ping,set,get -n 100000 --csv
Benchmark a specific command line:
$ redis-benchmark -r 10000 -n 10000 eval 'return redis.call("ping")' 0
Note that benchmark results can vary depending on various factors, such as the hardware and network configuration, the Redis configuration, and the workload characteristics. Therefore, it is recommended to perform multiple runs with different settings and analyze the results carefully.
Conclusion
Redis is a powerful in-memory data store that can be used as a database, cache, and message broker. In this article, we discussed how to install and secure Redis on Rocky Linux 8. By following the best practices for securing Redis, you can ensure that your data is safe and protected from unauthorized access.