Terraform is an open-source infrastructure automation tool that enables you to manage and provision infrastructure in a cloud-agnostic way. It allows you to define and deploy infrastructure as code (IaC), which means that you can manage your infrastructure the same way you manage your code. Terraform is compatible with various cloud providers like AWS, Azure, and Google Cloud. It allows you to write configuration files in a high-level language called HashiCorp Configuration Language (HCL). In this blog post, we will go through the steps to install Terraform on Rocky Linux 8 or Centos 8 using the yum command.
Steps to Install Terraform on Rocky Linux 8 or Centos 8
Step 1: Update the System
Before installing any package on a Linux system, it is always a good practice to update the system first. This ensures that you have the latest security patches and bug fixes installed. To update the system, run the following command:
$ sudo yum update -y
This command updates all the installed packages on your system.
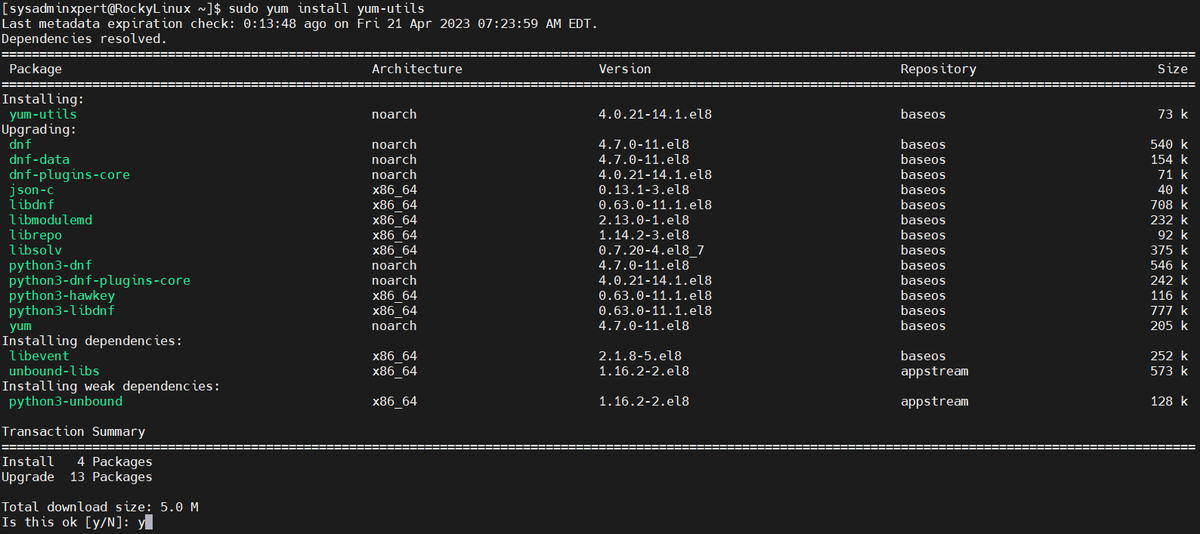
Step 2: Install the yum-utils package
$ sudo yum install yum-utils
Step 3: Add the official HashiCorp repo
$ sudo yum-config-manager --add-repo https://rpm.releases.hashicorp.com/RHEL/hashicorp.repo
Sample Output:
[sysadminxpert@RockyLinux ~]$ sudo yum-config-manager --add-repo https://rpm.releases.hashicorp.com/RHEL/hashicorp.repo
Adding repo from: https://rpm.releases.hashicorp.com/RHEL/hashicorp.repo
Step 4: Install the EPEL Repository
The Extra Packages for Enterprise Linux (EPEL) repository is a community-driven repository that provides additional packages that are not available in the default Rocky Linux repositories. To install the EPEL repository, run the following command:
$ sudo yum install epel-release -y
This command installs the EPEL repository on your system.
Step 5: Install Terraform
Once you have updated your system and installed the EPEL repository, you can install Terraform using the yum command. To install Terraform, run the following command:
$ sudo yum install terraform -y
This command installs the latest version of Terraform available in the Rocky Linux repositories.

Sample Output:
[sysadminxpert@RockyLinux ~]$ sudo yum install terraform -y
Hashicorp Stable - x86_64 92 kB/s | 1.0 MB 00:11
Last metadata expiration check: 0:00:01 ago on Fri 21 Apr 2023 07:42:06 AM EDT.
Dependencies resolved.
================================================================================================================================================
Package Architecture Version Repository Size
================================================================================================================================================
Installing:
terraform x86_64 1.4.5-1 hashicorp 21 M
Installing dependencies:
git x86_64 2.31.1-3.el8_7 appstream 160 k
git-core x86_64 2.31.1-3.el8_7 appstream 4.8 M
git-core-doc noarch 2.31.1-3.el8_7 appstream 2.6 M
perl-Error noarch 1:0.17025-2.el8 appstream 45 k
perl-Git noarch 2.31.1-3.el8_7 appstream 77 k
perl-TermReadKey x86_64 2.37-7.el8 appstream 39 k

Transaction Summary
================================================================================================================================================
Install 7 Packages

Total download size: 28 M
Installed size: 99 M
Downloading Packages:
(1/7): git-2.31.1-3.el8_7.x86_64.rpm 27 kB/s | 160 kB 00:05
(2/7): perl-Error-0.17025-2.el8.noarch.rpm 261 kB/s | 45 kB 00:00
(3/7): perl-Git-2.31.1-3.el8_7.noarch.rpm 337 kB/s | 77 kB 00:00
(4/7): perl-TermReadKey-2.37-7.el8.x86_64.rpm 246 kB/s | 39 kB 00:00
(5/7): git-core-doc-2.31.1-3.el8_7.noarch.rpm 383 kB/s | 2.6 MB 00:07
(6/7): git-core-2.31.1-3.el8_7.x86_64.rpm 618 kB/s | 4.8 MB 00:07
(7/7): terraform-1.4.5-1.x86_64.rpm 1.8 MB/s | 21 MB 00:11
------------------------------------------------------------------------------------------------------------------------------------------------
Total 1.2 MB/s | 28 MB 00:24
Hashicorp Stable - x86_64 720 B/s | 3.9 kB 00:05
Importing GPG key 0xA621E701:
Userid : "HashiCorp Security (HashiCorp Package Signing) <security+packaging@hashicorp.com>"
Fingerprint: 798A EC65 4E5C 1542 8C8E 42EE AA16 FCBC A621 E701
From : https://rpm.releases.hashicorp.com/gpg
Key imported successfully
Running transaction check
Transaction check succeeded.
Running transaction test
Transaction test succeeded.
Running transaction
Preparing : 1/1
Installing : git-core-2.31.1-3.el8_7.x86_64 1/7
Installing : git-core-doc-2.31.1-3.el8_7.noarch 2/7
Installing : perl-TermReadKey-2.37-7.el8.x86_64 3/7
Installing : perl-Error-1:0.17025-2.el8.noarch 4/7
Installing : perl-Git-2.31.1-3.el8_7.noarch 5/7
Installing : git-2.31.1-3.el8_7.x86_64 6/7
Installing : terraform-1.4.5-1.x86_64 7/7
Running scriptlet: terraform-1.4.5-1.x86_64 7/7
Verifying : git-2.31.1-3.el8_7.x86_64 1/7
Verifying : git-core-2.31.1-3.el8_7.x86_64 2/7
Verifying : git-core-doc-2.31.1-3.el8_7.noarch 3/7
Verifying : perl-Error-1:0.17025-2.el8.noarch 4/7
Verifying : perl-Git-2.31.1-3.el8_7.noarch 5/7
Verifying : perl-TermReadKey-2.37-7.el8.x86_64 6/7
Verifying : terraform-1.4.5-1.x86_64 7/7

Installed:
git-2.31.1-3.el8_7.x86_64 git-core-2.31.1-3.el8_7.x86_64 git-core-doc-2.31.1-3.el8_7.noarch perl-Error-1:0.17025-2.el8.noarch
perl-Git-2.31.1-3.el8_7.noarch perl-TermReadKey-2.37-7.el8.x86_64 terraform-1.4.5-1.x86_64

Complete!
[sysadminxpert@RockyLinux ~]$
Step 6: Verify the Installation
After the installation is complete, you can verify the installation by running the following command:
$ terraform version
This command displays the version of Terraform installed on your system. If Terraform is installed correctly, you should see output similar to the following:
Sample output:
[sysadminxpert@RockyLinux ~]$ terraform version
Terraform v1.4.5
on linux_amd64
Features of Terraform
1. Infrastructure as Code (IaC)
Terraform enables you to define and manage infrastructure resources as code, making it easier to version control, collaborate, and automate infrastructure management processes. This means you can manage infrastructure resources the same way you handle code.
2. Multi-Cloud Support
Terraform supports several cloud providers, including AWS, Azure, and Google Cloud Platform, among others. It allows you to provision and manage resources in a cloud-agnostic manner, meaning you can avoid vendor lock-in and easily switch between cloud providers.
3. Resource Graph
Terraform uses a resource graph to manage dependencies between infrastructure resources. This ensures that Terraform knows the order in which resources need to be provisioned and can do so automatically.
4. Plan and Apply
Terraform has a two-step process for provisioning infrastructure resources: plan and apply. The plan step generates a list of resources that need to be created, updated, or destroyed. The apply step then executes the plan to create, update, or destroy resources.
5. Modules
Terraform allows you to organize your infrastructure code into reusable modules. Modules can be used to create encapsulated and reusable components that can be shared across different projects.
Benefits of Terraform
1. Increased Productivity
Terraform automates infrastructure management tasks, saving you time and increasing productivity. You can avoid manual configuration and provisioning of resources, which can be time-consuming and error-prone.
2. Infrastructure Consistency
Terraform allows you to define infrastructure resources in a consistent and repeatable manner, ensuring that your infrastructure resources are always configured correctly and that there are no deviations from your desired state.
3. Reduced Costs
Terraform allows you to provision infrastructure resources on-demand, avoiding unnecessary resource allocation and reducing costs. You can also avoid over-provisioning resources, which can lead to unnecessary expenses.
4. Scalability
Terraform makes it easy to scale infrastructure resources by defining the required resources in the code. You can also scale resources automatically based on demand, helping you handle sudden spikes in traffic or workloads.
Conclusion
Terraform is a powerful tool that allows you to manage your infrastructure as code. Installing Terraform on Rocky Linux is a straightforward process that can be done using the yum command. By following the steps outlined in this blog post, you can quickly install Terraform and start managing your infrastructure in a cloud-agnostic way.
FAQ’s
Here are some frequently asked questions about Terraform:
1. What is Terraform used for?
Terraform is an open-source tool that allows you to define and provision infrastructure resources as code. You can use Terraform to automate infrastructure management tasks and ensure infrastructure consistency, leading to increased productivity, reduced costs, and improved scalability.
2. What language is Terraform written in?
Terraform is written in the Go programming language, and it is an open-source tool developed by HashiCorp.
3. What cloud providers does Terraform support?
Terraform is compatible with multiple cloud providers, such as Amazon Web Services (AWS), Microsoft Azure, Google Cloud Platform, Oracle Cloud Infrastructure, and more.
4. What distinguishes Terraform from other Infrastructure as Code (IaC) tools?
Terraform is cloud-agnostic, allowing it to work with various cloud providers. Additionally, it uses a simple syntax to define resources and has a resource graph that manages dependencies between resources.
5. What is a Terraform module?
A Terraform module is a reusable component that encapsulates infrastructure code to create and manage resources in a repeatable and consistent manner. Modules can be shared across different projects to ensure consistency and standardization.
6. What is the process for provisioning infrastructure resources with Terraform?
Terraform’s process for provisioning infrastructure resources involves two steps: plan and apply. The plan step generates a list of resources that need to be created, updated, or destroyed. The apply step executes the plan to create, update, or destroy resources.
7. What are some of the benefits of using Terraform?
Terraform offers numerous benefits, including increased productivity, infrastructure consistency, reduced costs, and improved scalability. By automating infrastructure management tasks, Terraform saves time, avoids errors, and enables the easy scaling of infrastructure resources based on demand.
End of the article, we’ve explained how to install Terraform on Rocky Linux 8.
Most commonly used Terraform commands:
Terraform is a popular Infrastructure as Code tool that allows you to manage and provision infrastructure resources in a declarative way. In this section, we will provide a list of Terraform commands along with a brief explanation of each command.
terraform init
This command initializes a new Terraform working directory by downloading the necessary providers and modules specified in the configuration files.
terraform plan
This command generates an execution plan that describes what changes Terraform will make to the infrastructure resources when applied.
terraform apply
This command applies the changes specified in the execution plan and provisions the infrastructure resources.
terraform destroy
This command destroys the infrastructure resources that were created by Terraform.
terraform validate
This command validates the Terraform configuration files and ensures that they are syntactically correct and adhere to the provider’s schema.
terraform state
This command provides a way to inspect and modify the Terraform state file, which is used to track the current state of the infrastructure resources.
terraform import
This command imports existing infrastructure resources into the Terraform state file, allowing you to manage them with Terraform.
terraform output
This command displays the output values from the Terraform state file, which can be useful for retrieving information about the infrastructure resources.
terraform refresh
This command refreshes the state of the infrastructure resources, which updates the Terraform state file with the latest information.
terraform version
This command displays the version of Terraform that is currently installed on your system.
terraform workspace
This command provides a way to manage multiple workspaces within a single Terraform configuration. Workspaces allow you to create multiple environments (e.g. dev, staging, prod) and switch between them easily.
terraform state pull
This command retrieves the current state of the infrastructure resources from a remote state backend, which can be useful for sharing the state with other team members.
terraform state push
This command pushes the current state of the infrastructure resources to a remote state backend, which can be useful for sharing the state with other team members.
terraform state replace-provider
This command replaces one provider with another in the Terraform state file, which can be useful for migrating from one provider to another.
terraform providers
This command lists the installed providers and their versions, which can be useful for verifying the provider configuration and ensuring compatibility with the Terraform version.
These are some of the most commonly used Terraform commands. By using these commands, you can easily manage and provision your infrastructure resources as code, and ensure that your infrastructure is always in a consistent and predictable state.