In this article, we’ll explain how to upgrade Java 16 to Java 17 on Rocky Linux 8 or AlmaLinux 8. Java is a popular programming language that is widely used for developing applications and software. It is an open-source language, and its latest version is Java 17, which was released on September 14, 2021. If you are using Rocky Linux 8 or AlmaLinux 8 and want to upgrade from Java 16 to Java 17, this blog will guide you through the process.
Before upgrading, it’s important to note that Java 17 has different system requirements than Java 16. It requires a minimum of 2 GB of RAM and a 2 GHz or faster processor. It also requires a minimum of 350 MB of disk space for the JRE and 1 GB of disk space for the JDK.
Features of Java 17:
Java 17 was released in September 2021 and introduced several new features and improvements. Some of the significant changes in Java 17 include:
- Sealed Classes: Sealed classes restrict the set of classes that can extend or implement them. This is useful when you want to define a fixed set of classes for a certain use case.
- Pattern Matching for switch Expressions: Pattern matching is now available in switch expressions, allowing for more concise and expressive code when working with complex data types.
- New Language Features: Java 17 has added various language features, including text blocks, the local variable syntax for lambda parameters, and improved handling of null values.
- Enhanced Security: Java 17 has several security enhancements, including support for the latest TLS versions and improved certificate handling.
- Improved Performance: Java 17 has performance improvements, such as faster class loading and more efficient garbage collection.
- Improved APIs: Java 17 includes several improvements to existing APIs, such as the addition of new methods to the String and Collection classes, as well as enhancements to the CompletableFuture API.
- Removed Features: Some features deprecated in earlier versions have been removed, including the Applet API and the Pack200 compression scheme.
In summary, Java 17 comes with several new features and improvements that make it easier and more efficient to develop Java applications.
Now, let’s begin with the upgrade process.
Steps to Upgrade Java 16 To Java 17 on Rocky Linux 8 or AlmaLinux 8
Step 1: Check the current Java version
Before upgrading, you need to check the current version of Java installed on your system. You can do this by opening a terminal and typing the following command:
java -version
This command will display the current version of Java installed on your system. If you see Java 16, you can proceed with the upgrade process.

Sample output:
[sysadminxpert@RockyLinux ~]$ java -version
openjdk version "16.0.2" 2021-07-20
OpenJDK Runtime Environment (build 16.0.2+7-67)
OpenJDK 64-Bit Server VM (build 16.0.2+7-67, mixed mode, sharing)
[sysadminxpert@RockyLinux ~]$
Step 2: Check the available Java 17 version:
dnf search jdk | egrep -- '-17'
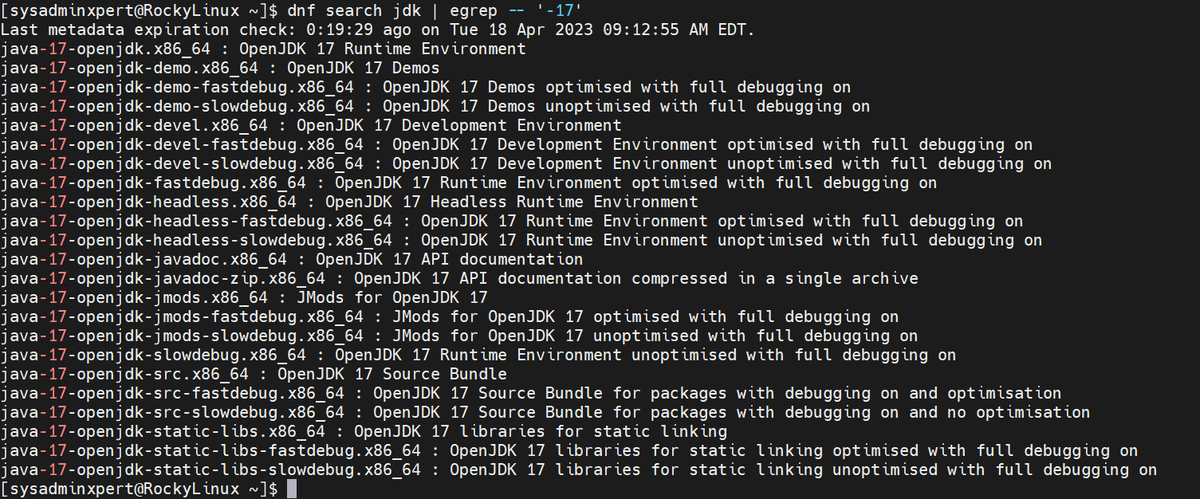
Sample Output:
[sysadminxpert@RockyLinux ~]$ dnf search jdk | egrep -- '-17'
Last metadata expiration check: 0:19:29 ago on Tue 18 Apr 2023 09:12:55 AM EDT.
java-17-openjdk.x86_64 : OpenJDK 17 Runtime Environment
java-17-openjdk-demo.x86_64 : OpenJDK 17 Demos
java-17-openjdk-demo-fastdebug.x86_64 : OpenJDK 17 Demos optimised with full debugging on
java-17-openjdk-demo-slowdebug.x86_64 : OpenJDK 17 Demos unoptimised with full debugging on
java-17-openjdk-devel.x86_64 : OpenJDK 17 Development Environment
java-17-openjdk-devel-fastdebug.x86_64 : OpenJDK 17 Development Environment optimised with full debugging on
java-17-openjdk-devel-slowdebug.x86_64 : OpenJDK 17 Development Environment unoptimised with full debugging on
java-17-openjdk-fastdebug.x86_64 : OpenJDK 17 Runtime Environment optimised with full debugging on
java-17-openjdk-headless.x86_64 : OpenJDK 17 Headless Runtime Environment
java-17-openjdk-headless-fastdebug.x86_64 : OpenJDK 17 Runtime Environment optimised with full debugging on
java-17-openjdk-headless-slowdebug.x86_64 : OpenJDK 17 Runtime Environment unoptimised with full debugging on
java-17-openjdk-javadoc.x86_64 : OpenJDK 17 API documentation
java-17-openjdk-javadoc-zip.x86_64 : OpenJDK 17 API documentation compressed in a single archive
java-17-openjdk-jmods.x86_64 : JMods for OpenJDK 17
java-17-openjdk-jmods-fastdebug.x86_64 : JMods for OpenJDK 17 optimised with full debugging on
java-17-openjdk-jmods-slowdebug.x86_64 : JMods for OpenJDK 17 unoptimised with full debugging on
java-17-openjdk-slowdebug.x86_64 : OpenJDK 17 Runtime Environment unoptimised with full debugging on
java-17-openjdk-src.x86_64 : OpenJDK 17 Source Bundle
java-17-openjdk-src-fastdebug.x86_64 : OpenJDK 17 Source Bundle for packages with debugging on and optimisation
java-17-openjdk-src-slowdebug.x86_64 : OpenJDK 17 Source Bundle for packages with debugging on and no optimisation
java-17-openjdk-static-libs.x86_64 : OpenJDK 17 libraries for static linking
java-17-openjdk-static-libs-fastdebug.x86_64 : OpenJDK 17 libraries for static linking optimised with full debugging on
java-17-openjdk-static-libs-slowdebug.x86_64 : OpenJDK 17 libraries for static linking unoptimised with full debugging on
[sysadminxpert@RockyLinux ~]$
Step 3: Download or Install Java 17 on Rocky Linux or AlmaLinux 8
To download Java 17, you need to visit the official website of Oracle and download the latest version of Java 17. You can download the JDK or JRE, depending on your requirement. Make sure to select the appropriate platform, i.e., Linux x64 for Rocky Linux 8 or AlmaLinux 8.
Alternatively, you can also download OpenJDK 17, which is an open-source implementation of Java 17. You can download it from the official website of OpenJDK or using the following command:
Method 1: Install Java 17 using dnf command on Rocky Linux
For this blog, I have used method 1, which is very simple to install Java 17.
sudo dnf install java-17-openjdk java-17-openjdk-devel

Sample Output:
[sysadminxpert@RockyLinux ~]$ sudo dnf install java-17-openjdk java-17-openjdk-devel
Extra Packages for Enterprise Linux 8 - x86_64 2.7 kB/s | 5.6 kB 00:02
Extra Packages for Enterprise Linux 8 - x86_64 41 kB/s | 14 MB 05:49
Last metadata expiration check: 0:04:03 ago on Tue 18 Apr 2023 09:39:45 AM EDT.
Dependencies resolved.
====================================================================================================================================
Package Architecture Version Repository Size
====================================================================================================================================
Installing:
java-17-openjdk x86_64 1:17.0.6.0.10-3.el8_7 appstream 451 k
java-17-openjdk-devel x86_64 1:17.0.6.0.10-3.el8_7 appstream 5.1 M
Installing dependencies:
java-17-openjdk-headless x86_64 1:17.0.6.0.10-3.el8_7 appstream 43 M

Transaction Summary
====================================================================================================================================
Install 3 Packages

Total download size: 49 M
Installed size: 206 M
Is this ok [y/N]: y
Downloading Packages:
(1/3): java-17-openjdk-17.0.6.0.10-3.el8_7.x86_64.rpm 459 kB/s | 451 kB 00:00
(2/3): java-17-openjdk-devel-17.0.6.0.10-3.el8_7.x86_64.rpm 1.9 MB/s | 5.1 MB 00:02
(3/3): java-17-openjdk-headless-17.0.6.0.10-3.el8_7.x86_64.rpm 3.7 MB/s | 43 MB 00:11
------------------------------------------------------------------------------------------------------------------------------------
Total 3.9 MB/s | 49 MB 00:12
Running transaction check
Transaction check succeeded.
Running transaction test
Transaction test succeeded.
Running transaction
Running scriptlet: java-17-openjdk-headless-1:17.0.6.0.10-3.el8_7.x86_64 1/1
Preparing : 1/1
Installing : java-17-openjdk-headless-1:17.0.6.0.10-3.el8_7.x86_64 1/3
Running scriptlet: java-17-openjdk-headless-1:17.0.6.0.10-3.el8_7.x86_64 1/3
Installing : java-17-openjdk-1:17.0.6.0.10-3.el8_7.x86_64 2/3
Running scriptlet: java-17-openjdk-1:17.0.6.0.10-3.el8_7.x86_64 2/3
Installing : java-17-openjdk-devel-1:17.0.6.0.10-3.el8_7.x86_64 3/3
Running scriptlet: java-17-openjdk-devel-1:17.0.6.0.10-3.el8_7.x86_64 3/3
Running scriptlet: java-17-openjdk-headless-1:17.0.6.0.10-3.el8_7.x86_64 3/3
Running scriptlet: java-17-openjdk-1:17.0.6.0.10-3.el8_7.x86_64 3/3
Running scriptlet: java-17-openjdk-devel-1:17.0.6.0.10-3.el8_7.x86_64 3/3
Verifying : java-17-openjdk-1:17.0.6.0.10-3.el8_7.x86_64 1/3
Verifying : java-17-openjdk-devel-1:17.0.6.0.10-3.el8_7.x86_64 2/3
Verifying : java-17-openjdk-headless-1:17.0.6.0.10-3.el8_7.x86_64 3/3

Installed:
java-17-openjdk-1:17.0.6.0.10-3.el8_7.x86_64
java-17-openjdk-devel-1:17.0.6.0.10-3.el8_7.x86_64
java-17-openjdk-headless-1:17.0.6.0.10-3.el8_7.x86_64

Complete!
[sysadminxpert@RockyLinux ~]$
Method 2: Download Java 17 tar file
If you have downloaded Java 17 tar.gz file from the Java official website then follow below steps.
Once you have downloaded Java 17, you can install it on your system. The installation process may vary depending on the type of package you have downloaded.
If you have downloaded the JDK, follow these steps to install it:
1. Open a terminal and navigate to the directory where the JDK package is downloaded.
2. Run the following command to extract the package:
tar -xvf jdk-17_linux-x64_bin.tar.gz
3. Move the extracted folder to the /opt/ directory using the following command:
sudo mv jdk-17 /opt/
4. Set the JAVA_HOME environment variable by running the following command:
export JAVA_HOME=/opt/jdk-17
5. To make the changes permanent, add the above command to the /etc/profile file using the following command:
sudo echo "export JAVA_HOME=/opt/jdk-17" >> /etc/profile
6. Verify the installation by running the following command:
java -version
If you have downloaded the JRE, follow these steps to install it:
1. Open a terminal and navigate to the directory where the JRE package is downloaded.
2. Run the following command to extract the package:
tar -xvf jre-17_linux-x64_bin.tar.gz
3. Move the extracted folder to the /opt/ directory using the following command:
sudo mv jre-17 /opt/
4. Set the JAVA_HOME environment variable by running the following command:
export JAVA_HOME=/opt/jre-17
5. To make the changes permanent, add the above command to the /etc/profile file using the following command:
sudo echo "export JAVA_HOME=/opt/jre-17" >> /etc/profile
6. Verify the installation by running the following command:
java -version
Step 4: Update the Java alternatives
After installing Java 17, you need to update the Java alternatives on your system. Java alternatives allow you to switch between different versions of Java installed on your system. To update the Java alternatives, run the following command:
Change the version of ‘java’:
$ sudo alternatives --config java
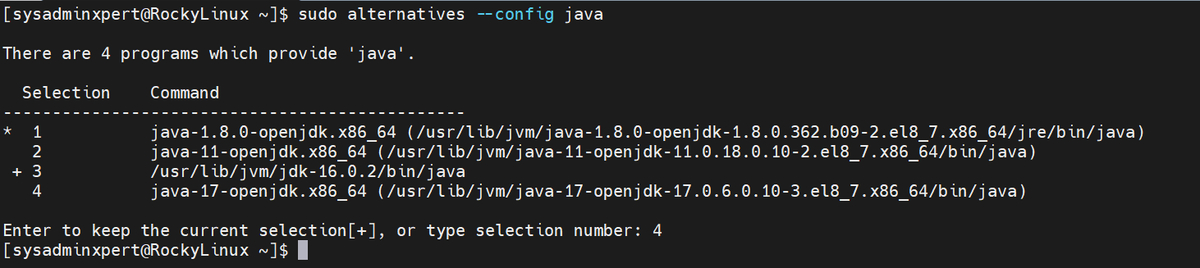
Select the preferred version, In my case to set Java 17 I have entered ‘4’.
This command sets Java 17 as the default version of Java on your system.
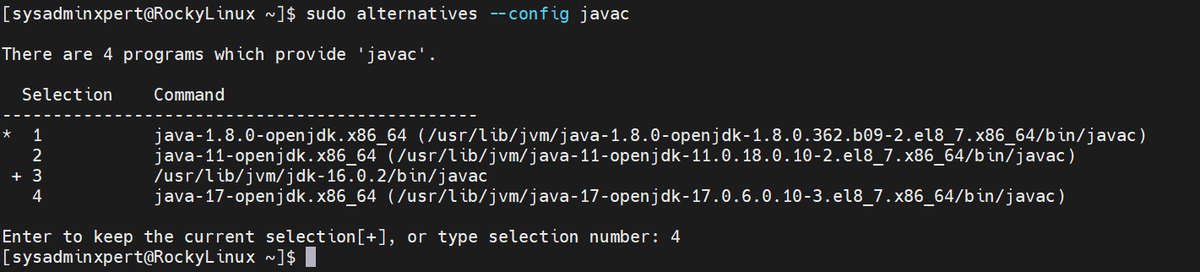
Change the version of ‘javac’:
sudo alternatives --config javac
Step 5: Verify the Java Installation
You can verify the Java version by running the following command:
java --version
javac --version

Sample Output:
[sysadminxpert@RockyLinux ~]$ java --version
openjdk 17.0.6 2023-01-17 LTS
OpenJDK Runtime Environment (Red_Hat-17.0.6.0.10-3.el8_7) (build 17.0.6+10-LTS)
OpenJDK 64-Bit Server VM (Red_Hat-17.0.6.0.10-3.el8_7) (build 17.0.6+10-LTS, mixed mode, sharing)
[sysadminxpert@RockyLinux ~]$
[sysadminxpert@RockyLinux ~]$ javac --version
javac 17.0.6
[sysadminxpert@RockyLinux ~]$
Step 6: Set the JAVA_HOME Environment Variable
After installing Java 17, you need to set the JAVA_HOME environment variable to point to the new Java installation. To do this, open the terminal and enter the following command:
To set the JAVA_HOME path for system-wide configuration, you can follow the steps below:
$ sudo vim /etc/environment
This command will open the environment file in the Vim text editor. Add the following line to the file:
export JAVA_HOME=$(readlink -f /usr/bin/java | sed "s:/bin/java::")
Save the file and exit the text editor.
To apply the changes, you can either log out and log back in or run the following command in the terminal:
$ source /etc/environment
This will update the environment variables with the new JAVA_HOME path.
After following these steps, the JAVA_HOME environment variable will be set for all users on the system, and you can use it in your applications or scripts as needed.
Verify Java home path
echo $JAVA_HOME
Sample Output:
[sysadminxpert@RockyLinux ~]$ echo $JAVA_HOME
/usr/lib/jvm/java-17-openjdk-17.0.6.0.10-3.el8_7.x86_64
Step 7: Test the Java installation
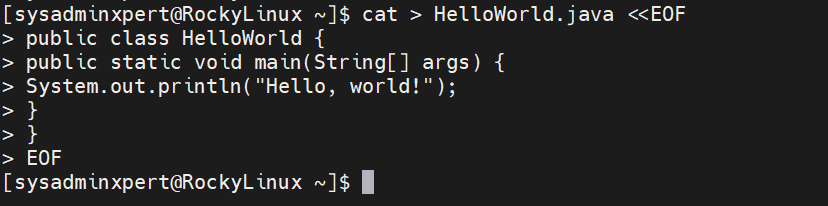
Finally, you need to test the Java installation to ensure that it is working correctly. To do this, you can create a simple Java program and compile and run it. Here is an example:
cat > HelloWorld.java <<EOF
public class HelloWorld {
public static void main(String[] args) {
System.out.println("Hello, world!");
}
}
EOF
Compile the Java program using the following command:
javac HelloWorld.java
Run the Java program using the following command:
java HelloWorld
Sample output:
[sysadminxpert@RockyLinux ~]$ javac HelloWorld.java
[sysadminxpert@RockyLinux ~]$
[sysadminxpert@RockyLinux ~]$ java HelloWorld
Hello, world!
[sysadminxpert@RockyLinux ~]$
If the Java installation is working correctly, you should see the output “Hello, world!” in the terminal.
Additional tips:
Clean up old Java version
Once you have successfully upgraded to Java 17, you can remove the old Java versions from your system. To do this, run the following command:
sudo dnf remove java-1.6.0-openjdk
This command removes Java 16 from your system. You can also remove other older versions of Java using a similar command.
Congratulations! You have successfully upgraded Java 16 To Java 17 on Rocky Linux 8 or AlmaLinux 8.
In conclusion, upgrading to the latest version of Java is crucial for developers and users alike as it ensures that they have access to the latest features and security patches. Upgrading from Java 16 to Java 17 on Rocky Linux 8 or AlmaLinux 8 is a simple process that involves downloading and installing Java 17, updating the Java alternatives, and removing the old Java versions from your system.
Additionally, some applications may require a specific version of Java, so it is important to verify that the application is compatible with the version of Java you plan to install.
Upgrading to Java 17 is highly recommended as it brings a variety of new features and improvements to the language, including new language features, improved performance, and enhanced security features. By following the steps outlined in this blog, you can easily upgrade to Java 17 and enjoy the latest benefits of the language.
See also:
Steps to Upgrade Java 8 to Java 11 on CentOS 7
How to Upgrade Java 11 To Java 16 on Rocky Linux or AlmaLinux
How to Upgrade Java 8 To Java 11 on Rocky Linux or AlmaLinux
How to Install Java 8 on Rocky Linux 8 / CentOS 8 / RHEL 8: A Step-by-Step Guide
How to Upgrade Java 8 to Java 11 on Ubuntu 20