In this tutorial, you’ll learn how to Set or Change a Hostname in CentOS 7. Hostname is a name given to the server/machine, if you provide a unique name for the server then it will be very easy to find and identify different servers on your network.
How to Set or Change a Host name in CentOS 7
Prerequisites
- CentOS 7 must be up and running
- Access to CentOS machine with root/sudo privileges
- Need Text editor Vi/Vim
You can provide any name to server before that go through below rules.
- hostnames letters are case-insensitive.
- hostnames can contain letters (from a to z).
- hostnames can contain digits (from 0 to 9).
- hostnames can contain the dot special character ( . ).
- hostnames can contain only the hyphen character ( – ) as a special character.
- hostnames must start and end with a letter or a number.
- hostnames must contain between 2 and 63 characters long.
Hostname is used to display the system’s DNS name, and to display or set its hostname or NIS domain name.
Types of hostnames:
- Static Hostname: This is very important and it stored hostname in file /etc/hostname. This is the one we used to set hostname to the machine permanently.
- Transient hostname: This is dynamic, it will get lost after reboot we can call it as temporary hostname. Transient hostname is maintained by the Kernel. Transient hostname is very useful when you want to do any small job for that you required to change hostname temporary But you don’t want to change hostname permanently.
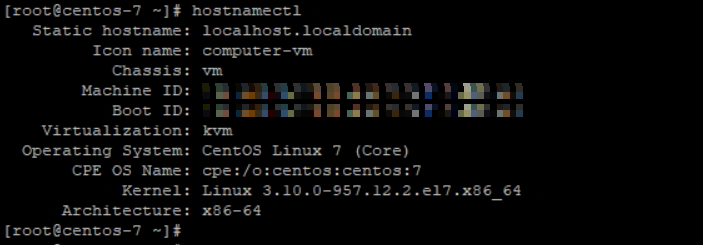
Step 1: Check Existing Hostname
# hostnamectl
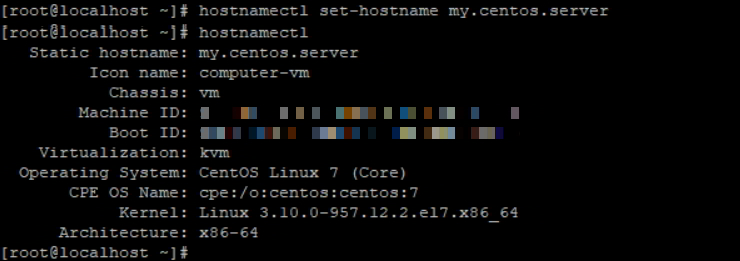
Step 2: Set or config new static Hostname
# hostnamectl set-hostname my.centos.server
![]()
Step 3: Verify the Hostname
In the previous step we have set the hostname for CentOS machine as a “my.centos.server”.
Now, verify the hostname with below command, it should display a new hostname.
# hostnamectl
Step 4: Add hostname in /etc/hosts file
Edit the /etc/hosts fie by using text editor and search for the line “127.0.0.1” and add the hostname at the end of the line.
Step 5: Reboot or Re-login to the CentOS and verify the hostname
[root@localhost ~]# cat /etc/hosts

127.0.0.1   localhost localhost.localdomain localhost4 localhost4.localdomain4 my.centos.server

::1         localhost localhost.localdomain localhost6 localhost6.localdomain6

[root@localhost ~]#

[root@localhost ~]# logout

#Re-Login
[root@my ~]#

[root@my ~]# hostname

my.centos.server

[root@my ~]#
You can also check the hostname using below command.
# hostnamectl
This will display the new hostname which is set in step 2
You can also check the CentOS hostname as mention below:
[root@my ~]# cat /etc/hostname

my.centos.server

[root@my ~]#
Try out some hostname command to get the machine details
# hostname
# hostname -s
# hostname -f
# hostname -i
# hostname -I
# hostname -d
# hostname -f
# hostname -A
This is the end of tutorial, you have learned how to Set or Change a Hostname in CentOS 7.