In this article, we’ll explain how to install and configure Zabbix on Ubuntu 20.10. Zabbix is a real-time monitoring tool that collects metrics from servers, applications, VMs and N/W devices. Zabbix is an open-source tool released under the GPL license v2. To collect metrics you need to install the Zabbix agent on a remote server.
Zabbix support server monitoring via TCP, ICMP, SNMP, SSH, JMX, IPMI and telnet. Zabbix sends alert/warring notification via, E-mail, slack webhook and SMS.
Zabbix stores information in a database so that you can view historical data, which helps in planning infrastructure changes like upgrade/downgrade or provisioning additional server.
Minimum System Resource requires to install Zabbix on Ubuntu 20.10
- Minimum of 128 MB RAM
- Minimum of 256 MB Disk space
Note: RAM and Disk space depend on No. of hosts and metrics are being monitored.
For example, If you are monitoring 1000 remote hosts then 4 GB of RAM and 5-10 GB of storage is sufficient for an Ubuntu machine.
Steps to install Zabbix on Ubuntu 20.10
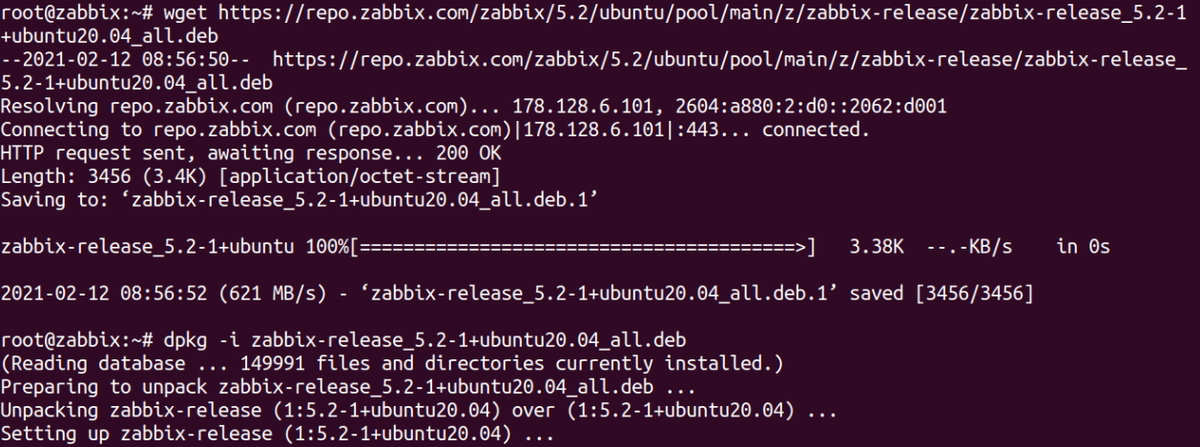
Step 1: Add Zabbix repository to Ubuntu system
$ wget https://repo.zabbix.com/zabbix/5.2/ubuntu/pool/main/z/zabbix-release/zabbix-release_5.2-1+ubuntu20.04_all.deb

$ dpkg -i zabbix-release_5.2-1+ubuntu20.04_all.deb
Sample Output:
root@zabbix:~# wget https://repo.zabbix.com/zabbix/5.2/ubuntu/pool/main/z/zabbix-release/zabbix-release_5.2-1+ubuntu20.04_all.deb
--2021-02-12 08:56:50-- https://repo.zabbix.com/zabbix/5.2/ubuntu/pool/main/z/zabbix-release/zabbix-release_5.2-1+ubuntu20.04_all.deb
Resolving repo.zabbix.com (repo.zabbix.com)... 178.128.6.101, 2604:a880:2:d0::2062:d001
Connecting to repo.zabbix.com (repo.zabbix.com)|178.128.6.101|:443... connected.
HTTP request sent, awaiting response... 200 OK
Length: 3456 (3.4K) [application/octet-stream]
Saving to: ‘zabbix-release_5.2-1+ubuntu20.04_all.deb.1’

zabbix-release_5.2-1+ubuntu 100%[========================================>] 3.38K --.-KB/s in 0s

2021-02-12 08:56:52 (621 MB/s) - ‘zabbix-release_5.2-1+ubuntu20.04_all.deb.1’ saved [3456/3456]

root@zabbix:~# dpkg -i zabbix-release_5.2-1+ubuntu20.04_all.deb
(Reading database ... 149991 files and directories currently installed.)
Preparing to unpack zabbix-release_5.2-1+ubuntu20.04_all.deb ...
Unpacking zabbix-release (1:5.2-1+ubuntu20.04) over (1:5.2-1+ubuntu20.04) ...
Setting up zabbix-release (1:5.2-1+ubuntu20.04) ...
root@zabbix:~
Step 2: Install Zabbix on Ubuntu
sudo apt update
sudo apt install zabbix-server-mysql zabbix-frontend-php zabbix-apache-conf zabbix-agent
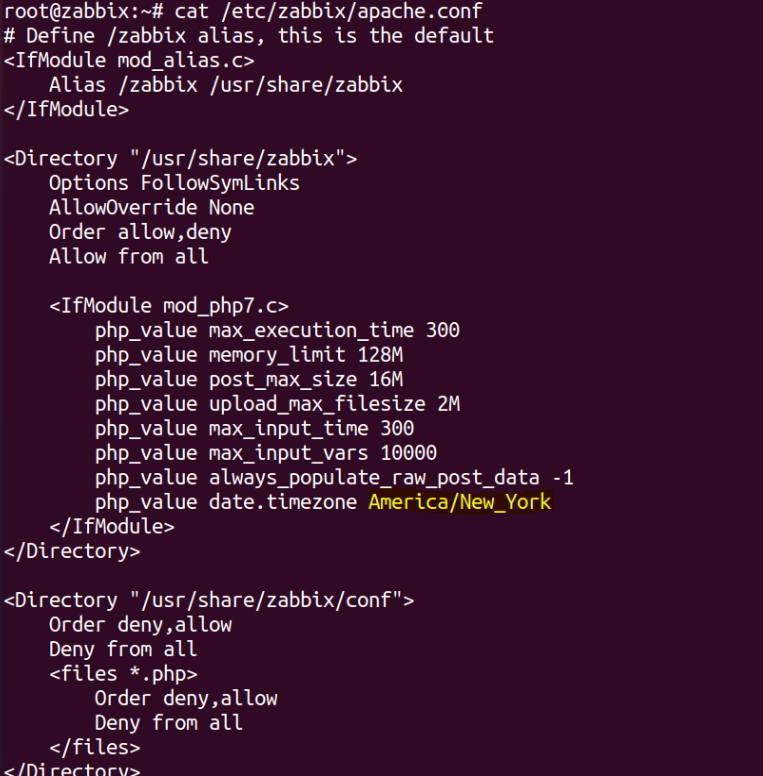
Step 3: Update timezone as per your location
sudo nano /etc/zabbix/apache.conf
<IfModule mod_php7.c>

...
...

php_value date.timezone America/New_York

...
...

</IfModule>
Step 4: Install MySQL Server
This is optional if you already have mysql server then skip to next step.
# sudo apt install mysql-server

# sudo mysql_secure_installation
Sample Output
root@zabbix:~# sudo mysql_secure_installation

Securing the MySQL server deployment.

Connecting to MySQL using a blank password.

VALIDATE PASSWORD COMPONENT can be used to test passwords
and improve security. It checks the strength of password
and allows the users to set only those passwords which are
secure enough. Would you like to setup VALIDATE PASSWORD component?

Press y|Y for Yes, any other key for No: y

There are three levels of password validation policy:

LOW Length >= 8
MEDIUM Length >= 8, numeric, mixed case, and special characters
STRONG Length >= 8, numeric, mixed case, special characters and dictionary file

Please enter 0 = LOW, 1 = MEDIUM and 2 = STRONG: 2
Please set the password for root here.

New password:

Re-enter new password:

Estimated strength of the password: 50
Do you wish to continue with the password provided?(Press y|Y for Yes, any other key for No) : y
By default, a MySQL installation has an anonymous user,
allowing anyone to log into MySQL without having to have
a user account created for them. This is intended only for
testing, and to make the installation go a bit smoother.
You should remove them before moving into a production
environment.

Remove anonymous users? (Press y|Y for Yes, any other key for No) : y
Success.


Normally, root should only be allowed to connect from
'localhost'. This ensures that someone cannot guess at
the root password from the network.

Disallow root login remotely? (Press y|Y for Yes, any other key for No) :

... skipping.
By default, MySQL comes with a database named 'test' that
anyone can access. This is also intended only for testing,
and should be removed before moving into a production
environment.


Remove test database and access to it? (Press y|Y for Yes, any other key for No) : y
- Dropping test database...
Success.

- Removing privileges on test database...
Success.

Reloading the privilege tables will ensure that all changes
made so far will take effect immediately.

Reload privilege tables now? (Press y|Y for Yes, any other key for No) : y
Success.

All done!
root@zabbix:~#
Successfully MySQL installed and setup.
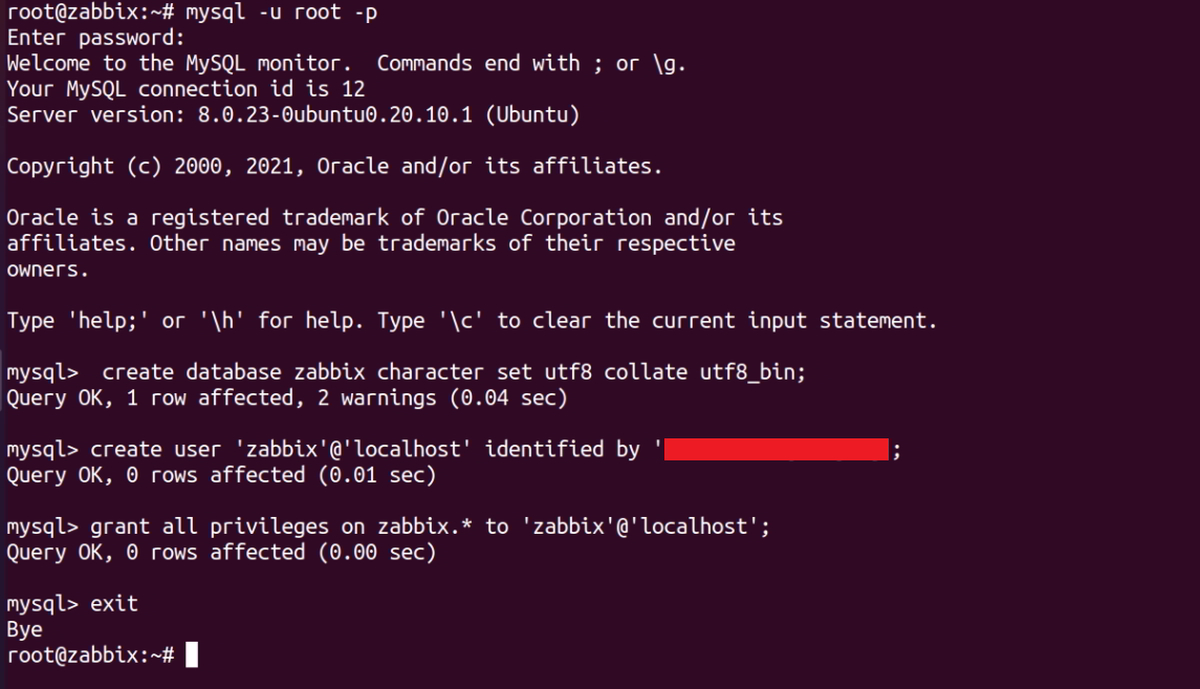
Step 5: Create MySQL database user
# sudo mysql -u root -p
→ Create database for zabbix, for this blog I created database with “zabbix” name
mysql> create database zabbix character set utf8 collate utf8_bin;
mysql> create user 'zabbix'@'localhost' identified by '<password>';
mysql> grant all privileges on zabbix.* to 'zabbix'@'localhost';
mysql> exit
Here I have used Zabbix as a DB name, zabbix as a user and password. Make changes as per your need.
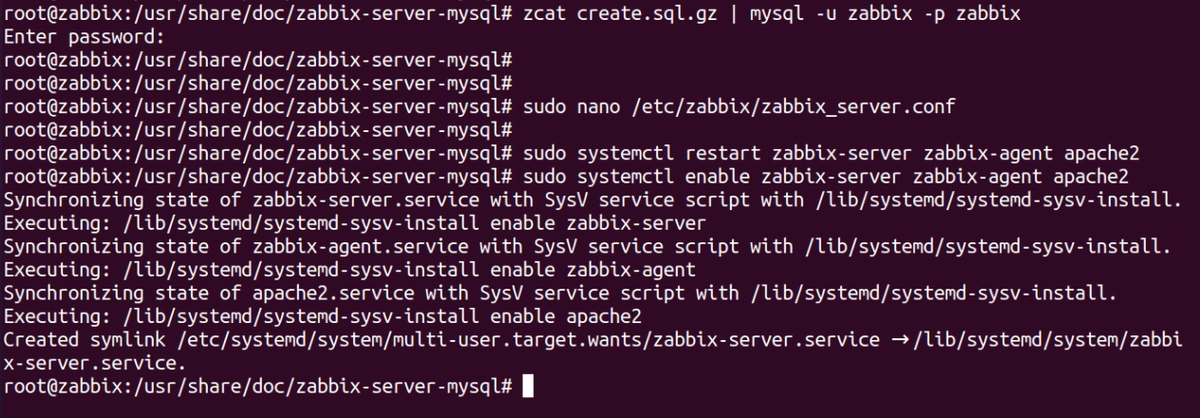
Step 6: Import schema in DB.
cd /usr/share/doc/zabbix-server-mysql

zcat create.sql.gz | mysql -u zabbix -p zabbix
Sample Output:
root@zabbix:~# cd /usr/share/doc/zabbix-server-mysql
root@zabbix:/usr/share/doc/zabbix-server-mysql#
root@zabbix:/usr/share/doc/zabbix-server-mysql# zcat create.sql.gz | mysql -u zabbix -p zabbix
Enter password:
root@zabbix:/usr/share/doc/zabbix-server-mysql#
root@zabbix:/usr/share/doc/zabbix-server-mysql#
Step 7: Update Zabbix configuration
Locate to Zabbix configuration file “/etc/zabbix/zabbix_server.conf”
sudo nano /etc/zabbix/zabbix_server.conf
Make sure you entered all details correctly.
DBHost=localhost
DBName=zabbix
DBUser=zabbix
DBPassword=yourpassword
Step 8: Restart service to reflect all the changes
sudo systemctl restart zabbix-server zabbix-agent apache2
Step 9: Automatically start services on boot
sudo systemctl enable zabbix-server zabbix-agent apache2
Step 10: Setup Zabbix from web UI:
http://your-zabbix-ip-address/zabbix/
First, you will get a welcome page.
Zabbix Welcome Page
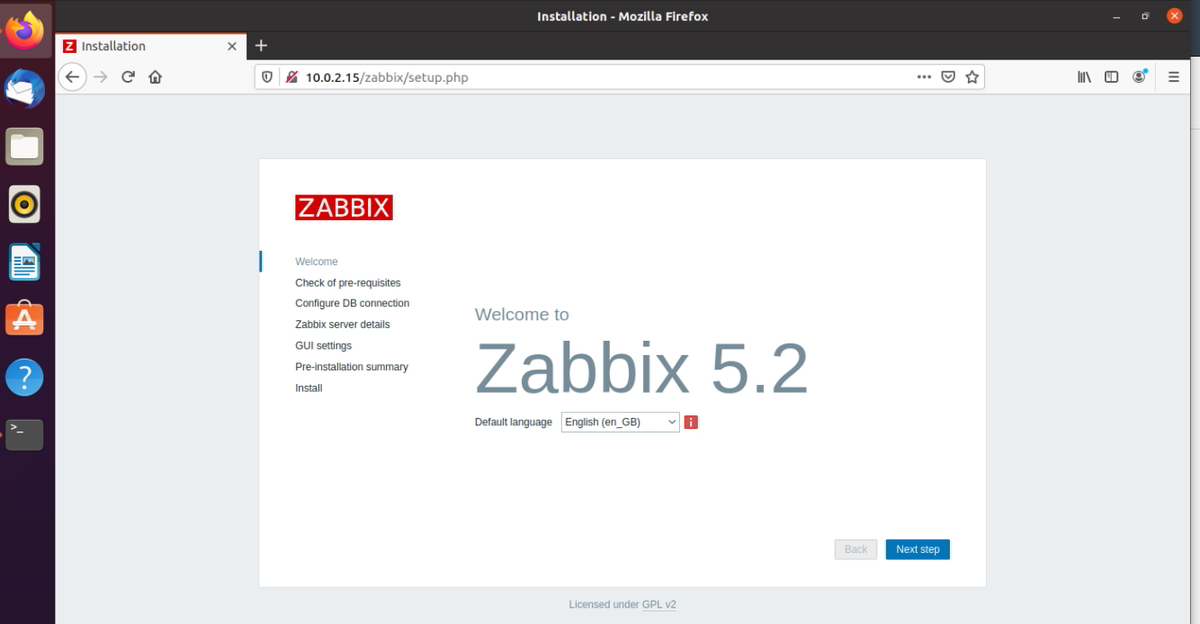
Click on next.
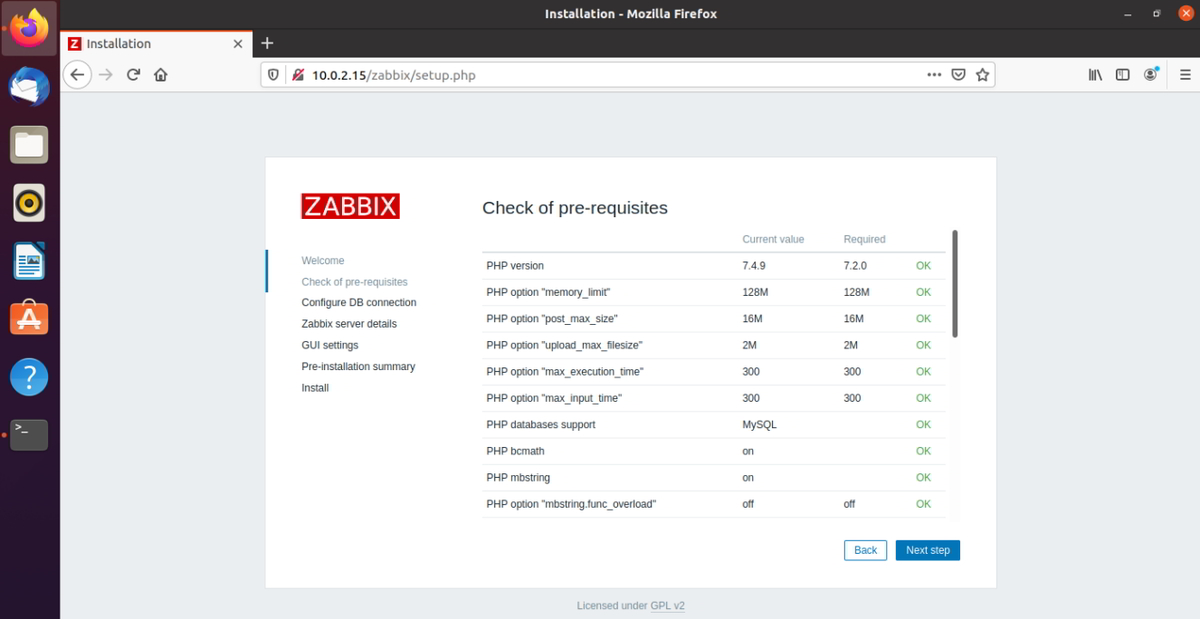
Check of pre-requisites
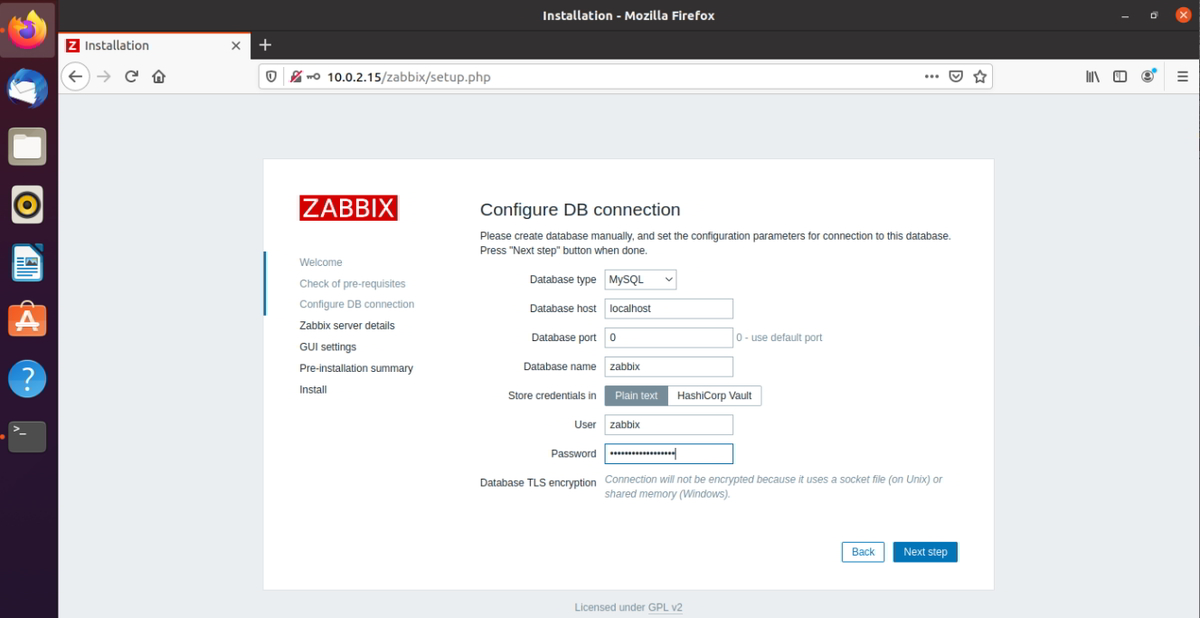
Configure DB connection
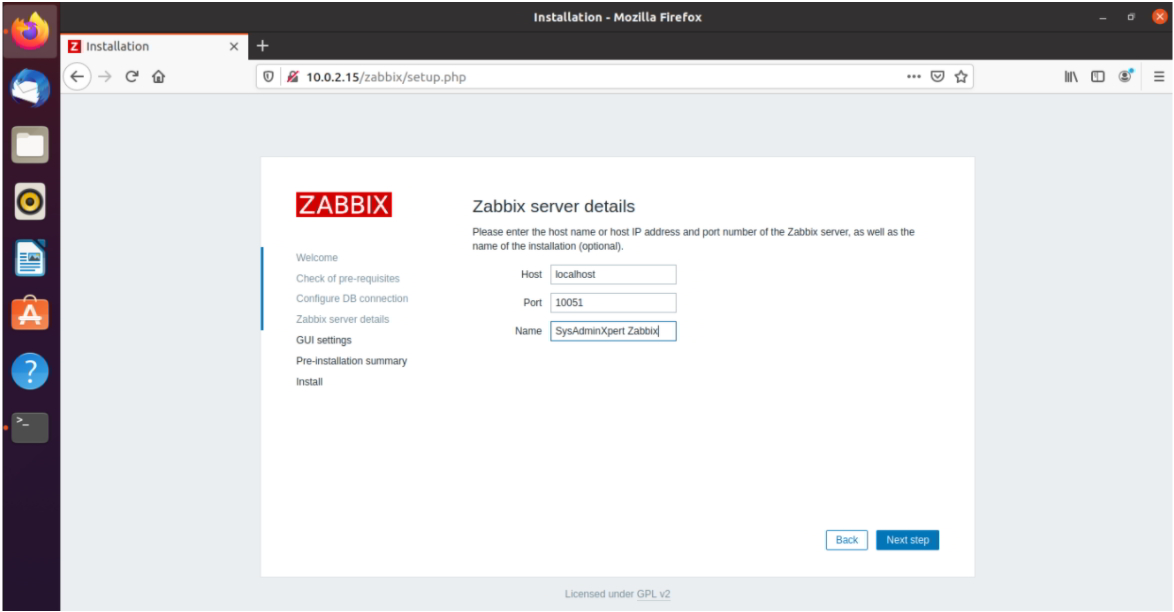
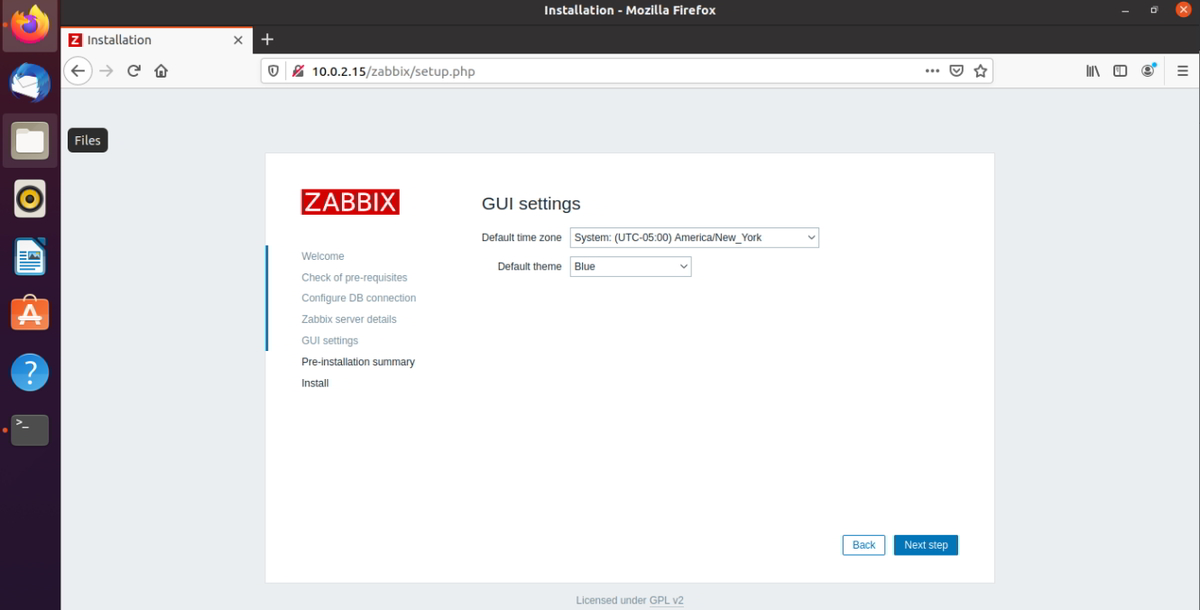
Enter Zabbix server details
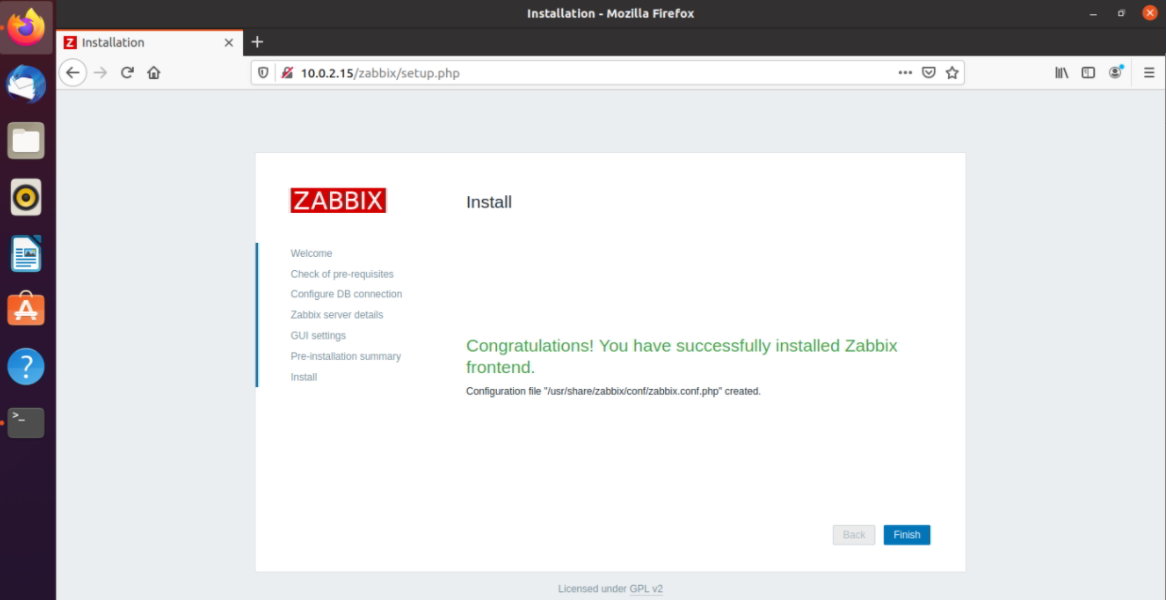
Pre-installation summary:

Successfully installed Zabbix and click on finish.
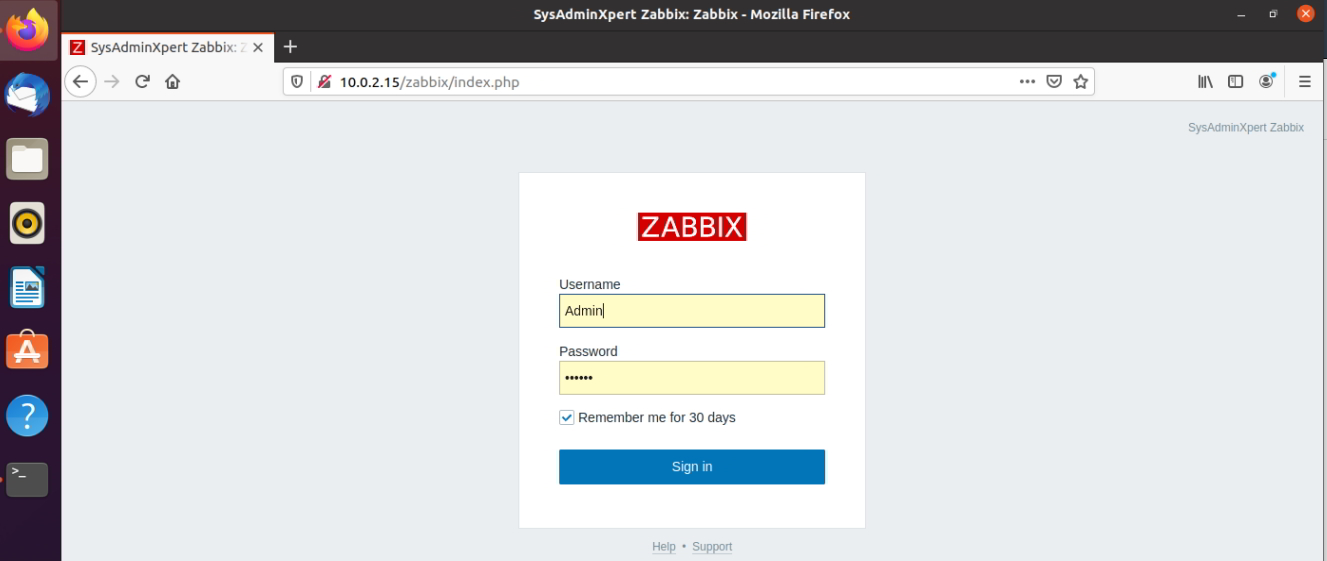
Step 11: How to access Zabbix from UI
http://your-zabbix-ip-address/zabbix/
Enter the username and password.
- Username: Admin
- Password: zabbix
Note: Username is case-sensitive
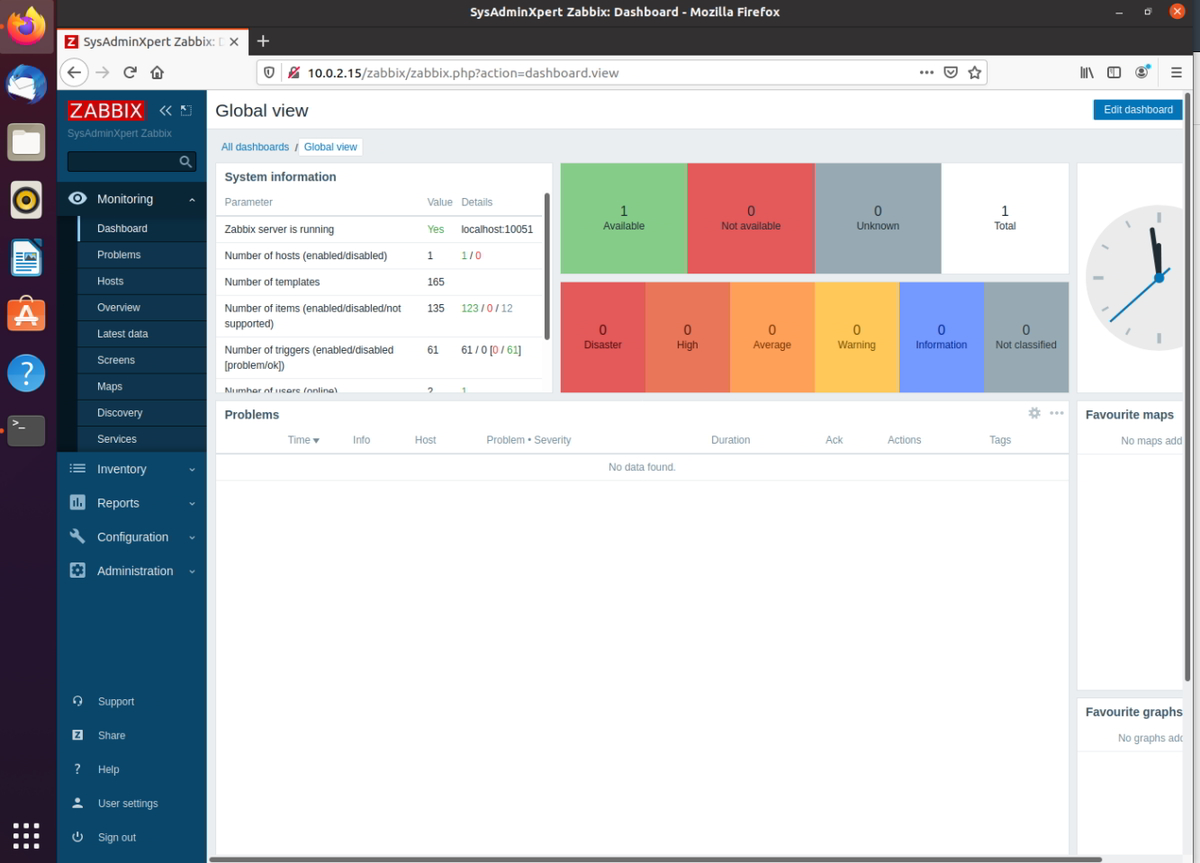
Zabbix Dashboard:
This is the End of the article, you have successfully Installed and Configure Zabbix on Ubuntu 20.10.
See also: